How In The Fuck….?

How In The Fuck….?
Of all the crazy shit I did when I was younger and trust me it was a lot, I have to say I never tried riding a rhinoceros.
In my defense, that is probably only because the opportunity never presented its self.

This is all the proof anyone needs to show without question that the 2020 Presidential election was stolen outright.
For those who cry Misinformation I say watch it and prove it wrong.
This is going to destroy the Democratic Party.
This is by necessity, a very long post. I strongly recommend that you take the time to read and share it as this one has some extremely valuable information in it.
As impossible as it seems from my end of the stick, the author of these articles is even busier than I am.
I really have no idea how he manages to do it day after day as he is literally busy trying to be self sufficient as much as possible so these articles are usually hard earned experience talking.
When he manages to tear the time out of his crazy schedule to send me these updates, then I have to tear time out of mine to format and post them.
I am EXTREMELY grateful to him for doing this for us and I will post anything he wants to send to me.
Todays offering is kind of a Threeper. A bit of gardening, a section on Animal Husbandry and then the Household Cyclopedia. He sent me a link to something called the Household Cyclopedia in PDF form that was originally published back in 1881 that has so much information that has been lost through the generations that it boggles my mind.
OVER 800 PAGES!
For damn sure everyone should download that PDF and save it.
I had to go search for it because I couldn’t just post the link from my Email.
First off I want to post his latest offering.
This also has some critical information that has been lost through the generations as we moved away from an agricultural existence to the modern city/urban lifestyle , losing thousands of years of Day To Day survival knowledge in the process.
I will post a link so you can download this as a Word document and then links to all the previous Food Grower articles at the end.
What TPTB are working on at this very minute is the slow starvation of millions of people as part of their Depopulation scheme.
YOU SHOULD ALL BE SAVING THIS INFORMATION AS IF YOUR LIVES DEPENDED ON IT.
You should also be making sure that it can be found by friends and family for the future.
This is why I asked the author to help me reprint all this in the first place.
Now let’s get on with it shall we?
From the author,
I thought I might mix it up a little in this article so this one is kind of a threeper.
Part I – Garden Starts
Are you starting your garden starts yet? If not, how do you know when is the right time to start your plants? We basically feel there’s kind of three ideologies, for lack of a better term, for the timing of starting garden plants.
One of the oldest and what a lot of people still do is to wait for your soil to get warm enough and direct sow everything as soon as you can. This will work but it doesn’t give you the best control of your garden and it can preclude growing some longer season crops. The other two ideologies give you more control and vary by what your objective is.
A second line of thinking is trying to get everything to come off at the same time, sort of like planning a big meal and you want all the food dishes to be ready when folks sit down to the table. Part of the rationale for this planting method is to have a harvest and get it over with. The reasons may be uncertainty about weather conditions at the end of your growing season, when you have more help to get the harvest in and processed; yet another is because something you are doing requires more than one crop to accomplish – say making home made dill pickles where you need pickling cukes and dill or a salsa where you need tomatoes, sweet and chili peppers and cilantro, you get the idea.
What you do here is examine all of your plants for their days to maturity (hereafter known as DTM) and then, picking a target harvest date, work backwards from that date by subtracting the DTM from that date for each plants starting date. So if you have corn with 97 DTM and you want to harvest the third week of August (we’ll pretend the 16th), your corn would need to be planted around the first week of May. My last thought on this is remember that harvest is an occurrence, not an event. Just because that corn package says 97 DTM doesn’t mean on the 97thday it will all be ready to harvest, some will mature earlier and some later.
There are a couple of shortcomings to this method. One is there are crops that don’t do as well in the heat of the summer. Another is you can get overwhelmed by the amount of work that harvesting and preserving all of your crops at the same time is and end up loosing a bunch of harvest because you can’t get to it.
A third ideology is what we do. We still take a look at the DTM, and then we factor in whether the crop has a short or long harvest period. On plants that have a short harvest period, say corn, we’ll make several successive plantings of the crop, approximately the harvest period apart. Instead of planting all of our corn at the same time, approximately 2000 lineal feet, we plant four blocks of corn with each successive block nine to twelve days later than the last. Instead of having a big harvest that pretty much comes off over about a twelve to fifteen day period we have a continual harvest for six to eight weeks. This give us fresh eating corn for much longer and time to process other crops instead of being overwhelmed by the corn.
Crops that have a long harvest period, like chili and sweet peppers or tomatoes all get planted at the same time but are started based on their days to maturity. My Carolina Reaper and Ghost peppers will be started around the first of February because they they have such a longer DTM than the sweet peppers do (which won’t get started until the middle of April).
For crops like leaf lettuce we will start them nearly all year long and container grow them due to their short DTM. We also vary the varieties we grow because some do better in hot weather than others.
Other crops like cilantro, that have a very short amount of time before they go to seed (at least in our environment), will see us planting small amounts of seed every few days. This way we are assured of a harvest when we need it.
Ok, the preceding information was pretty generalized because it is beyond our scope for space to cover every garden plant there is. My intent was to make you think about what you have been doing and some things that might be hindering your efforts.
Some folks won’t be aware that you can double crop some of your garden varieties. As an example we routinely double crop some of our herb, and cold weather and root crops like beets, radishes, broccoli and cauliflower, fennel, mustard, spinach, peas, bok choy and cabbage for a few.
You also need to take into consideration your particular growing environment. If you aren’t sure of your environment, research the gardening zone you are in. This will tell you a lot about what crops you will be successful growing and give you an idea of when your first frost and last frost dates are. These dates will factor into when you can or should start some of your plants.
Having cold frames or greenhouses will change the game for you as well. If you have the space I would encourage you to incorporate these last two items into your growing efforts. They will greatly expand your growing season. One word of caution on the cold frames. Most folks will have very short cold frames to take advantage of the solar gain of heating a smaller area. This can bite you as well when you get a bright sunny day that pushes the temps to damaging highs. We build all of our cold frames with hinges on the lids so we can prop open the covers and avoid burning our plants if they start to go over temperature.
Part II Beyond The Garden
I authored a variation of portions of this some time ago, in another place, but it is very relevant to survival food growing. Right now I want you to go to your cupboards and refrigerator and take an inventory of foods, herbs and spices you don’t want to go without. Not all of them will be garden truck related so growing garden veggies is only a part of growing food post collapse and I feel I need to at least air the concept of dairy products, beef, pork, fowl and wild fish and game as elements of our post collapse diet.
I believe the time is rapidly approaching when, in order to survive, you will need to know how to do more than just grow a garden.
II-a Animal Husbandry – Large Livestock, Dairy and Beef Cows
The first thing to come to grips with is not everyone is going to master keeping livestock. Animals for food vary in size from quite small (think rabbits) to very large (cattle or bison). Yes I know the situation may warrant eating rats and vermin, which are smaller than rabbits, but I don’t see myself ever getting to the point of being a rat wrangler.
The large animals will need sturdy facilities and a can require a large amount of space. After a severe enough collapse these may be available in abundant supply after the big die off, but if you are waiting until post collapse to get up to speed you are way behind the curve. This means if you are contemplating keeping livestock, especially if you are space challenged, you may want to devote some time cultivating a relationship with a small to medium sized farmer or rancher and volunteer some time helping them out. They’ll love the free help and you will get an education way beyond anything you could ever purchase.
Remember, these are my opinions here with more than a smattering of fact mixed in. These are huge topics and they are being abbreviated to a few paragraphs. Additionally I have years of what could be called institutional knowledge and it’s easy for me to gloss over or completely forget to cover some aspect of something. If I leave you in the dark, or your knowledge and experience is different than mine hit me up in the comments and we’ll try to find the middle ground. As a final thought you are responsible for performing your own due diligence and ensuring any process you employ or objective you strive for. Ultimately you are responsible for your own actions and safety.
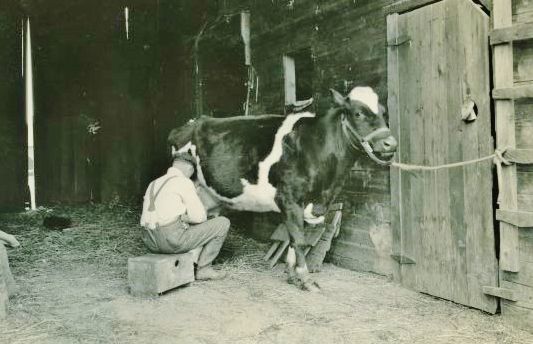
Following my list above I’m going to cover dairy products first. Remember when I asked you to go to your pantry and refrigerator and take an inventory of what you didn’t want to live without? A big portion of mine was the dairy products. We like fresh milk, homemade cheeses – both hard and soft (to keep from writing homemade dozens of times just consider everything in the following list as homemade), butter, sour cream, yogurt, cottage cheese, whipped cream, buttermilk, custards and ice cream to name a few.
The first part of dairy products is the cow so I’m going to talk about cows for a bit and a lot of this would spill over to beef cattle. The first thing to come to grips with if you decide you want to include dairy in your post collapse diet is how many cows you need, to have a year round supply of your dairy products.
If you say one you’re wrong, you might get by with two and you’ll be better off with three and the best is four.
“Three or four cows to have fresh milk?” you say, “What are you nuts?”
No I’m not. Every cow has a milking cycle each year, the max of which is around 305 days. I’ll tell you right now if you’re milking your cow 300 or more days a year you are just wearing her out faster.
Let’s define some terms and play with some numbers for a moment.
Goals
You have two goals with breeding a milk cow, one is to get her fresh so you can milk her, the other is to maximize your calf crop. The longer after calving you wait to breed your cow the more you lose however you want to measure that, lost money potential, lower feed conversion, lost lbs milk and slower herd build time are a few. Actually there’s a third goal, to maximize how many years the cow is a viable milker.
Heat
After calving a cow will come back into heat in around a month and half to two months. Some folks believe if you try to breed her this soon you’re just wasting bull time or semen (if you’re practicing AI) and you should wait for the next cycle to breed her. After her first heat the cow will come into heat around every 20~21 days after that. Subjectively I’d say my personal experience runs around 80% success breeding on the first heat.
Gestation
So let’s say we do breed the cow at 2 months. Average gestation for a dairy cow is 270 to 280 days so we’ll just call it nine months for right now.
Dry Period
The mammary gland of a cow needs a dry period in order to prepare for the next parturition (a fancy way of saying give birth). Dry periods of less than 40 days will decrease milk production on the next lactation cycle. Dry periods of longer than 70 to 80 days can cause the same condition to occur. Personally I’ve always gone with 60 days. This number works well with the rest of my math in a few moments.
Weaning
Weaning is the process of taking a calf away from nursing on the cow. You want to do this for a couple of reasons. The biggest of which is you want the milk production for your use. Some folks will say you can wean a calf at eight weeks. I’ve done this out of necessity but I much prefer to stretch it out to at least twelve weeks and prefer sixteen weeks. Calves seem to carry better when they are weaned a little later. So for the purpose of my discussion we’ll call it four months.
Milking Cycle
As previously mentioned, some folks try to squeeze out a 305 day milking cycle. I usually shoot for six months.
Why six months? Twelve months minus two months (dry period) plus four months before weaning = six months, leaving six more months (milking cycle).
Two milk cows bred on opposite half year cycles give you a full years milking without burning out your cow sooner. This is a very easy situation to manage and takes a lot of the stress out of things.
Ok, that explains the need for two cows, but where do the third or fourth cows come into play? Redundancy, that’s where. There are many things that can take your cow out of production, injury and illness are two (not to mention death for a third). Let’s say you are two thirds of the way through your milk cycle and your cow develops mastitis (an udder infection).
What are you going to do, go for two to three months without fresh milk and all the other items a milk cow provides? Having a third cow on a different cycle gives you a margin of recovery. The fourth cow lets you run two cows on each half year offset cycle for the ultimate in redundancy. You are free to leave the calf on the cow for longer, or you are in a position to have more milk so you can feed more of the hungry hordes that come pounding on your door after tshtf. Especially when they find you have cheese and ice cream.
The above numbers and time lines allow you a little wiggle room with no problem if you need it, say for instance the cow doesn’t take on the first cycle and you have to wait another twenty days to try again. This is easily factored in with no trouble.
Feed
Given a chance a cow will graze most of the day, take a rest and then graze until nearly dark. So just how much food does a cow need? Just like everything else it will vary by the breed of cow, the particular cow (size etc), the season, whether you have her on a liquid diet, dry feed or green feed and whether you are going to give her supplements.
Because I don’t have any of the particulars of your particular cow all I can give you are some general guidelines. Right off the bat I’m going to exclude a liquid diet because post collapse you’re not likely to find a supplier and even if you did there’s no telling how long he would continue to receive product.
With dry feed you’re going to need between 1/3 and 2/3 ton of hay each month to keep your cow healthy and happy and to be honest with you 1/3 ton is probably a little light. You’ll also most likely need some grain but a lot of people have issues with giving distillers grains to milk cows (and beef cattle for that matter).
Personally I feed right at forty pounds and change of hay a day to the milk cows when they are on milking rotation. Roughly two thirds of that is alfalfa and the remainder is grass hay. They may get a little more grass hay time to time because I don’t measure the grass hay like I do the alfalfa and just fork a good amount of feed in their outside manger. I would rather they have something to chew than stand around bellowing because they are bored and think they are hungry.
I do grain my cows but I give a lot less than some folks recommend, right at 7 or 8 pounds of barley a day. Another thing I do is crack or roll the grain before I feed it. To see the difference rolling the grain does, feed your cow whole grain for a few days and then take a look at her cow pies. You’ll see a lot of grain there. Roll the grain and feed her the same amount and you won’t find any grain in her poo. She’ll make better use of it, and you’ll have a better feed conversion rate if you get rolled grain or have a rolling mill and roll your own.
But, what about keeping her on open pasture. You’ll also have more than a little work cut out for you to determine the carry capacity of your pasture to make sure you are going to have enough feed for your cow. You’ll also need to factor in that in most regions you will not be able to pasture a cow all year long and will need to put her on dry feed at some point. Other considerations are milk from a cow on pasture will have a different taste from that of a cow on dry feed, especially right after you transition them. A lot of folks notice a negative change in the taste of the milk during this period (don’t worry it will usually pass in a week or two).
Just above I mentioned carry capacity, this is a huge topic with tons of variables thrown in. One person may get by with 2 acres per cow while someone else in a different area might need 90 to 100 or more acres per cow.
What I do is feed my cows dry feed during the winter with a grain supplement. Once the pastures are in shape for grazing I’ll let her out on open pasture but still monitor her condition and feed her alfalfa and grain during milking.
Something else for you to take note of, when you transition from dry feed to green feed, it’s more than likely she will get a case of the green grass, ahem, trots. When this happens she’ll be able to stand flat footed, crap through a screen door at fifty feet and not touch a wire. It will pass after a bit but it can provide you with some exciting moments in the stanchion if the pressure builds while you’re milking.
Ok, you have some very rough ideas of how much feed you need to keep a milk cow happy and producing milk. Nearly 1250 lbs of feed a month is something you’ll need to give some planning to because putting up that much feed without the use of powered equipment will be quite a chore.
Water
The water needs of your cow will vary considerably dependent on a lot variables so I’ll just say she’ll need 1 to 2 gallons of water per 100 lbs of body weight. In extremely hot, dry environs this may not be enough. Personally I just have live water to all the tanks and have the feed lines hooked up to floats to keep them from running over.
Anything else? Yes there is.
You need to find a good buddy that has a bull because you need to get her bred shortly after she drops her calf. Either that or get your own bull and for one cow having a bull is a terrible feed conversion. Of course if you’ve taken heed to what I shared up above you may have four or more cows and then your bull can pull double duty keeping you in beef calves as well.
During part of the year she is going to be bothered by deer flies, horn flies, mosquitoes, ticks and a host of other pests. There are very few insecticides approved for lactating cows (that are being milked for human consumption) You have a choice of a spray, wipe or ear tag. Permethrin is the one I use in spray or wipe form. Don’t be a fool, read the label and follow the directions exactly, you don’t want to get this stuff on you. Again, post tshtf you most likely won’t be able to get this.
You need to find a good vet that doesn’t prep and make plans to bring him or her into your fold after the collapse. Either that or get some books and bone up on your veterinary knowledge because there must be at least a million things that can go wrong with your cow. While I don’t feel cows are all that much of a PITA they can provide you with endless hours of head scratching.
They start doing poorly and you won’t be able to figure out why. Maybe it’s hardware disease. No I’m not making this up. Cattle will consume all kinds of things when they eat. You run the risk of them ingesting wire from baling wire, along fence rows, nails and screws from around mangers and barns and so on. So you need a cow magnet to help you out. I’ll let you read up on it to see if I’m joking or not (I’m not).
Or maybe you notice some pale yellow clumps floating on the top of your milk pail after you get done milking one day. You may have a case of mastitis going on and I wouldn’t drink that milk if I were you. Sometimes you can take the cow out of milk rotation for awhile, treat the mastitis and then put her back into milk rotation. You’ll still need to keep milking her though, you just get to throw the results of your efforts out. Other times the cow will be out of rotation for good and the problem may not go away until she dries up and comes fresh again. And still other times the infection ruins the cow forever.
You’ll come out one morning and the cow won’t come to the barn. You go looking for her and she’s managed to wrap herself up in half a mile of barbed wire and she’s leaking blood like a sieve. So you pull out a pair of wire clippers, give thanks to God that she’s a gentle animal and start cutting her out. When you get her to the stanchion you whip out your med kit and take some quick stitches on the worst of the cuts. The rest you wash and disinfect.
It’s time for the cow to calve and guess what junior is coming breach. You are in for some fun now let me tell you. It gets real fun when the problem is so severe you cut junior up inside the cow and take him out in pieces. Yes this happens and let me tell you it’s a bad situation to face. One year we had…, never mind.
The cow drops junior and because he’s a mixed grade animal you don’t want or need him to be a bull. You can either band him or castrate him. Either one can be quite a bit of fun to accomplish, especially when you get called by your buddy to help him out and he doesn’t have a bull calf but something that looks like the cow crossed with godzilla.
There’s ton’s more so seriously you need to pick up a basic veterinary book on cattle and do some reading because you most likely are not going to have a vet in your group and while the average cow will not give you a lot of trouble throughout her life, you will at times have problems to solve and you don’t want to have to solve it by turning her into coyote bait.
Safety
Consuming raw milk is not the equivalent to putting a loaded gun to your head and pulling the trigger contrary to what some folks believe and what the CDC promotes. I and my family have consumed raw milk for years with no adverse effect. However, if you choose to do so, you do it at your own risk.
I can only think of two ways you could die from raw milk. The first would be if you are so lactose intolerant for it to be fatal if you drink milk. If this is the case you’re going to have the same response from pasteurized milk. The second way you could die from raw milk would be to drown in it.
With that out of the way, what will make you ill, with the potential to kill you is your lack of cleanliness and sanitation. Warm milk is an excellent growth medium and you can culture some real nasty things in a short amount of time if you’re not careful.
The Equipment
Sanitation starts at the milking equipment. You need a good stainless steel milking pail. While you might be tempted by the price to get a plated pail, don’t. The plating can develop fine cracks making it difficult to get 100% clean and sanitary. Spend the extra bucks and get the real deal. The fewer rivet holes, plate overlays etc. the better.
When you wash your pail, pay attention to the holes the bail goes through, actually anywhere there might be a crack, crevice, connection or overlap of materials. I can’t stress it enough get it all clean. You can sanitize your pail with a mixture of bleach and water, industrial strength hydrogen peroxide, or the old standby, boiling water.
A cow is a big animal. No matter how hard you clean her there is always going to be something coming off her body somewhere. Further she is eating just a few feet from where you are milking. I’ve had cows bounce bits of grain and hay out of the feed box on the stanchion back to the pail.
As a result, though when I was a kid I milked into an open pail, no big deal none of us died from it, these days I take an extra precaution and milk through a pail top filter. In my case I use two pieces of cheesecloth folded over to fit the top of the bucket. I hold one in place on the pail with surgical tubing, the second one I just place over the first one. It traps any foreign matter that may be floating around in the air, that drops off the cow, or gets flung around by whatever means. If something fouls the top filter it’s a simple matter to remove it before it can affect the milk. I’ll keep a couple extra filters in a zip lock bag when I’m milking if something happens. You will get some milk splatter on you milking through a filter but I wear a vest as a milking coat and it’s a simple matter to keep it clean.
Anything that is involved in your milking efforts needs the same basic treatment as your pail, thoroughly clean it and then sanitize it.
The Cow
The cow, as mentioned is a big animal and she has absolutely no concern about personal hygiene. She’ll poop and then lay right down in it. She’ll poop, churn it to a dry dust with her feet and then eat it while trying to eat something else. She doesn’t care what she pees in or on, including you.
How much effort you put to cleaning your cow will depend on how dirty she is. These days if she’s really dirty I use a spray nozzle on a garden hose connected to an on demand hot water heater to hose the worst of the gunk off her and then towel her upper body area dry. Post collapse I’ll just broom the worst of it off her and then spend the extra effort with hand cleaning anything else I think needs attention.
Extra effort goes into washing up her udder and teats. I draw a bucket of hot water and use lysol disinfectant in it. I am extremely picky about cleaning her udder and the surrounding area. Pay special attention to the bottom of her teats.
Whatever you do, don’t dip the cloth you are washing her with back into your bucket of clean water. I take an entire bag of cleaning cloths with me and use several each cleaning.
After I wash her I dry her with white paper towels. I specify white because if you’ve missed something, it’ll show up in a heart beat on the paper towel. I also take the time to periodically clip any long hair around her teats. They have teat dips you can use for sanitizing the teat but these might not be available post collapse.
Next you need to make sure your hands are completely clean, it does no good to get everything else clean and then milk with dirty hands. If you have a cut or sore that is badly infected you may want to consider wearing surgical gloves while milking. These increase the difficulty of milking but protects the milk from the bacteria in a cut.
One more step I do is to express some milk from each quarter before I start milking into the pail, a few squirts is all that is needed. Usually I’ll just express on the floor of the stanchion but every so often I’ll do it into small glass containers, one for each quarter. This lets me visually inspect the milk looking for any abnormalities and smell it. You might be surprised by what your nose can tell you.
Post milking I wash her udder again, dry her and then rub her down with bag balm. The lysol and action of milking her can cause chapping, dryness and tenderness. An added factor of spending this time with her before kicking her out of the stanchion is it allows the opening of her teats to start closing up, which minimizes the chance of her contracting environmental mastitis. It can take as long as an hour for the opening to close completely so this is another factor for ensuring she has a clean stall/paddock/pen area to be released into. If she has extremely dirty conditions where she’s at you may want to consider keeping her in the stanchion for longer before releasing her.
Post Milking
Ok, you have your pail of milk, you’re back at the house, now what. I carefully remove the pail filter from my pail and then I filter all the milk through a filter into a glass pitcher. From there it gets poured into glass jars. I always put two layers of waxed paper between the jar and the lids to ensure a good seal. Just like all the equipment above, it’s all been sanitized.
I’ve never seen, and didn’t take the time just now to look for, a commercial milk straining filter. I made my filter and there are several strategies you can use for filtering your milk, think something along the lines of a coffee filter to give you a starting idea.
The next step is to insure you get your milk cooled as quickly as possible. We have an old fridge used only for milk.
So to sum up, what you have is a critter that will weigh between 700 lbs. and 1800 lbs depending on breed, age, feeding and a few other things.
An animal this size can hurt you without trying beyond what you would believe. Think of them as the irresistible force. They can suddenly turn around in a tight area much smaller than you think they would and crush you between themselves and an immovable object flatter than a fly under a swatter. They can step on you and you’ll think you just lost all your toes on one foot (and maybe you did loose a few). They can kick you, roll over you and head butt you. They can kill you.
They will do the most contrary of things and then stand there looking at you with a bemused expression on their face and you can almost hear them asking why are you so upset?
They will defecate and urinate on you, equipment, other people and when you least expect it they will suddenly decide that clear across the pasture from you is where they want to be and they will joyfully spend half the day running you back and forth just to prove a point. Personally I never let it get that far, I just go throw a hull on a horse and let them do the work.
At around 1300 to 1500 pounds of feed a month you need to be thinking about where you are going to get that much to store, post total collapse, because it’s not likely you’ll be swathing and baling it. Even if you have the fuel, access to equipment and hay ground there’s some things, like threading and adjusting a knotter or replacing a twine needle on a baler that you city and urban folks have probably never even given any thought to.
Though I’ve had a few cows that I could milk anywhere, including in the middle of a pasture, you’ll most likely need a stanchion to hold her. You’ll need some equipment and supplies and have figured out a ready alternative to some of it (or lay in a heck of a stock) because you might not be able to get it after tshtf. Just remember, cows were being milked for a long time before we had a lot of the stuff we have today so it’s not like it’s impossible to do.
You need quite a bit of space to keep a cow and if you’re going to milk her for more than part of only one year, you need access to a bull to get her bred so you can milk her on subsequent years.
On the topic of space, I mentioned the carry capacity of your ground. In a nut shell this is the amount of land you need per animal, or the amount of animals you can have on a particular piece of ground.
There are many, many things that go into figuring this out so I’m going to give you a couple of shortcuts you can use. In most areas, folks that are raising livestock have been doing it for years, so just ask, “Hey Joe, how many cows can you carry on that quarter section your uncle Billy had up in the foothills?” And Joe will know because the land has been in his family since his great granddad helped open up the country and they have always had stock on it. If your land is similar you’ll have a very close estimate of what you can do with your piece of ground.
Another shortcut is to look for someone that is haying near your piece of ground and ask them how many tons of hay they get per acre. Now you have to do a little work with this information because their yield will vary on whether it’s grass or alfalfa, whether it’s irrigated, whether they fertilize like mad, how many cuttings a year they get and so on. But… if your ground is similar to theirs you can get a rough idea of how much that piece of ground will produce a year. Now you can work with that number and how much feed you need for your cow and get an idea of A – how much space you need for her, or B – how many cows you can carry on your piece of ground.
Remember this only gives you an approximate and you still have to take several things into consideration, also know that if you are giving her dry feed (hay) you can keep her on a much smaller piece of ground than if you are grazing her.
You need to have veterinary knowledge and skills because you will need them or you need to get close to a good vet.
Anyway, having stock is a big chore, they require constant care and they are dumber than a box of rocks and will get themselves in trouble in spite of your best efforts. They can get injured, sick, suffer from parasites and I guarantee they will try your patience.
Really think about it if you are contemplating a milk cow because in many respects they are as demanding as a newborn infant only instead of spitting up on you they have the potential to kill you. Why have a milk cow then? Because of all the dairy items you don’t want to live without.
Part IIb – Swine, Poulty, Wild Game and processing meat for consumption
I just realized that when I originally authored these articles I never went ahead and discussed these topics. I am about as time challenged as a person can get right now so I not going to explore these unless there is a demand from readers for me to write about raising swine, poultry and the taking of wild game. If you search there are quite a few sources on the web that discuss these topics. The same holds true for writing articles on processing an animal for table fare. There is a lot to know on slaughtering and butchering large animals whether domesticated or wild.
Part III – Back To The Basics or at least the 1880’s
There are many things that have the potential to upset the tranquility of our day to day lives and dump us into a situation where our existence is measured by our survival, be it an EMP taking out our electric grid, the world economy finishing its collapse, the global elite sparking internal and/or external strife that engulfs the U.S. or the world in the flames of war, pandemic or whatever your favorite doomsday scenario is.
Inarguably the most important tool of survival is your brain. The next most important facet is knowledge and the third is skill in applying that knowledge. Given the realization a lot of folks know how to do a lot of things something I’ve noticed is a disconnect between the means we accomplish things today relative to how they were done in “olden days”. What are you going to do and how are you going to accomplish it if you don’t have readily available energy? What would your life be like minus say gasoline/diesel and electricity? Without these two energy sources, petroleum based fuels and electricity, how do you get things done?
Included in the download links to this article is a volume titled The Household Cyclopedia of General Information published in 1881. Yep, it’s about eight hundred pages of knowledge of how they used to do things, beekeeping to butter making, shoeing a horse to how to plant a garden and growing grains, how to butcher and tan a hide, first aid, medical and dental care and even how to survive a shipwreck. The breadth of what is included is staggering and I’ll leave it to the title page and table of contents to list the full scope of topics.
Now I’m not going to tell you to do it just they way they did it back then because we have really expanded our knowledge base over the last one hundred thirty years or so but – they survived, lived and prospered with the knowledge of the day and with some gentle (and in some places a lot of) tweaking here and there so can you.
Study the methods of back then and then figure out how you are going to accomplish the tasks you need to perform to survive, aided by the benefit of a century of progress only without cheap and abundant energy.
Til later
foodgrower
—————————————————–
My thanks once again to him for taking his valuable time to relay this critical information.
Now for the links to this and all the previous articles.
.

They cut it off before the screaming started.

What’s even more fun is to have a sloped driveway like I do, drop a socket while you are laying under your vehicle with your arm contorted into an unnatural position up between the frame and the engine and then watch the bastard slowly roll all the way out into the street.
H/T to Paul for sending this one along.
You Haven’t Seen a Fucking Thing, Yet.
Let’s be honest here shall we?
You and your Commie buddies shit rings around yourselves if more than fifty of us show up together, at anyplace, at anytime.
What are you going to do when EIGHTY MILLION of us decide we have had enough?
Nuke us?
Call out the F-15’s?
No, you are all going to run as fast as you can and hide in the deepest hole available.
You talk a lot of shit old man.
All you Commie bastards do.
And every single one of you is scared to death that we might decide enough is enough someday and decide to come to see you.
EVERY SINGLE ONE OF YOU ARE COWARDS.
Extremists?
Spit.
Just wait until next year when your little Holodomor gets going full swing.
THEN, you are going to see some extremism.
I can’t hardly wait for it to park right in your front yard either.
Better start fencing it off again now.

Because you are going to be seeing it and hearing about it non stop for the next few years.
Because a very select few people want it, have planned it and are making it happen.
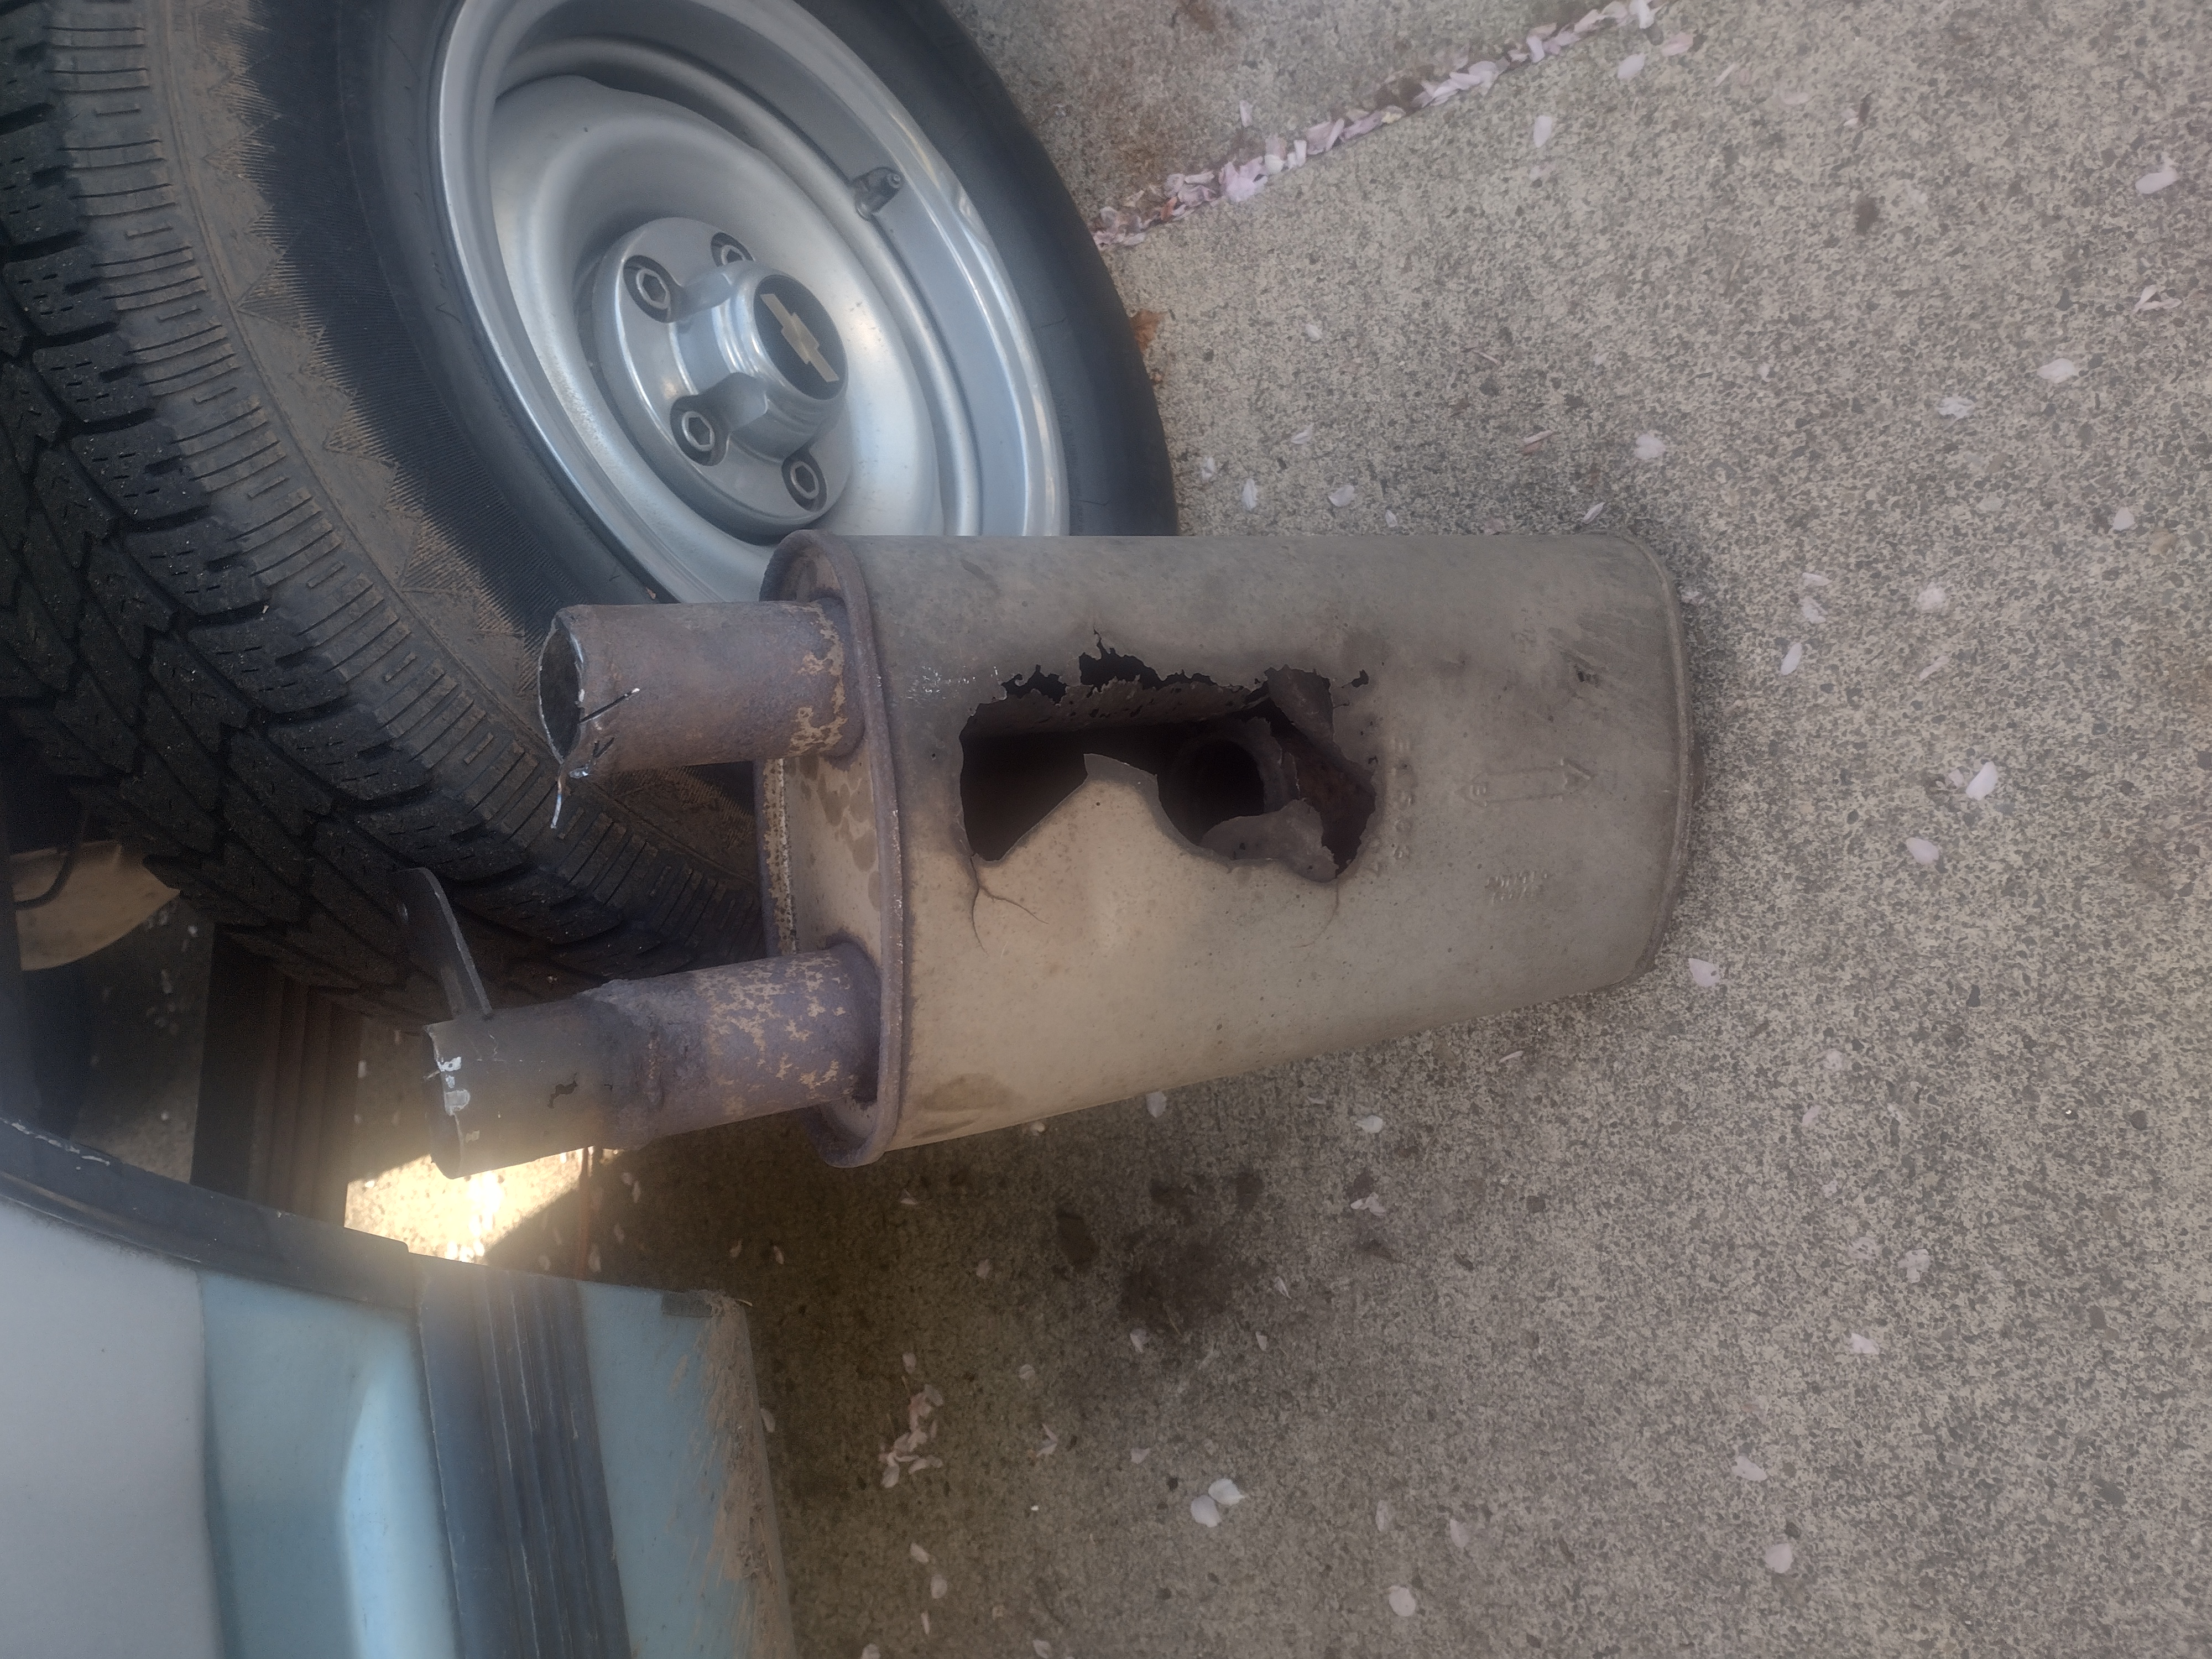
The muffler was bad in my old Chevy when I got it over a year ago.
Trust me when I say, it hasn’t gotten any better.
The thing sounds like shit and I leave for work at 6 AM every morning.
I’m sure more than one neighbor has been getting woke up when that old bastard fires up.
So I called a local muffler shop right after I got off work, while I was still in the parking lot.
I tell the guy what I have, 89 Chevy 1/2 ton, 2 wheel drive, 350 Small Block, I believe 2 1/2 into the muffler and it has two tail pipes coming out the back.
Wayul he says, it depends.
(Here we fucking go)
It depends on if’n your tail pipes ain’t rotten.
If they are still OK, it’ll be $185.
But.
But we’re booked solid for two weeks.
Now if’n your tail pipes are rotten, I can do a 2 1/2 in and a 2 1/2 out for $180, plus another $90 for a new tail pipe.
But.
But we’re booked up for two weeks solid.
Yeah, OK, so $275, PLUS TAX and yer booked up two weeks solid.
Got it, thanks.
Click.
Fumble fuck around for a minute, RING RING, Hello, Tony’s Auto Parts.
( It’s a womans)
So I go through the spiel again and ask her if they have a muffler.
Hold on.
Pretty soon she comes back and say’s they got something called a “Raptor” and it should fit.
$45.
Can you say “Turbo Muffler”?
So I ask if they have clamps and hangers and elbows and such and am assured that they do.
Thank’s darlin, I’ll be up there shortly.
I get up there and I see Jackie, the owners daughter,
Early 40’s, long dark hair, a little chubby but Cuter. Than. Hell., has a great sense of humor and is married to Rasputin’s second cousin removed.
I flirt with her all the time because we both know it’s completely harmless.
I ask her what the part number of that muffler she looked up for me was.
She looked confused for a second and say she didn’t look up any mufflers, must have been this other chick.
Who I have never met and have absolutely no idea who she is.
OOPS!
I laughed and told her about my conversation with this chick and she laughed too.
I fumble fucked around some more and had to have somebody else look up this muffler, now the third time I have had to explain the particulars.
This guy leads me over and we dig out the right one.
Then I am looking for clamps, hangers and an elbow.
No clamps, no elbow but they do have the hanger.

OK, gimme this, gimme that and gimme one of the band clamp thingies and I’ll see if I can make this work.
Off I go.
Get home, open the garage and start digging for Ye Olde Cordless Ryobi SawZall that is now at least 22 years old.
Find that bastard and crawl under the truck.
Lots of sound and fury but not much cutting action.
Crawl out, find another blade, change that sonofabitch and go at it again.
Because this old muffler is off to one side and this SawZall is so long, I am having a hell of a time cutting any damn thing.
Fuck This Noise.
Back into the garage and snag one of the several Harbor Freight $9.99 Angle Grinders I have laying around, put a new Cut Off wheel on it, drag an extension cord out there and start in again.
Fuck around, fuck around and fuck around some more, it took me at least 45 minutes to get the tail pipes cut off and the damn muffle cut.
Sparks everywhere.
Had the Cut Off wheel get grabbed when the exhaust sagged and the fucking grinder started smoking before I could get it unstuck, then it got stuck again but when I yanked it out at speed, it bounced off the pipe wrong and the disc exploded.
Thankfully I was smart enough to be way off to the side while doing all this and I didn’t get hurt. At the moment.
Finally got that shit out and skinned off the end of the muffler pipe off the exhaust pipe and got it all ready to put the new one on.
I managed to get lucky and there was a clamp at the front of the old muffler that I could reuse.
I stick the new one up there and it is looser than shit so I am trying to balance the fucker with my knee and tighten up this clamp at the same time.
Much cursing and muttering later, I get the damn thing up there and tightened up.
The only thing holding this whole show up is one single hanger, in front of the muffler.
It’s still fairly early at this point so I picked everything up, threw it in the garage, shut the door and headed down to….
O’Reilly’s.
The only thing nearby.
I get there, walk in and immediately see Muh Diversity behind the counters and just walk right fucking by all of ’em.
Back in the corner I find the miscellaneous exhaust parts.
Lots of little chrome goodies for the Rice Burners, of course.
However, I did find an elbow and some clamps.
I thought I had an exhaust tip that fit but wound up taking that back in.
Lord help me.
The obvious Chicano woman manager is talking to some guy, the Bright Red Dye haired one that looked like she was corn fed couldn’t use the cash register because the guy the manager was yakking at was logged in.
Big Red is flummoxed.
I stuck my arm up and snapped my fingers at Chica, this actually got her attention. When she looked my way, I flipped my hand over and pointed at Big Red.
She motions for the guy and comes over and unlocks the cash register.
Fiddle fuck around and Big Red asks me what my phone number is.
I say Uh Uh.
She say’s it’s required for returns.
I tell her to use hers.
Stunned cow at the slaughter house.
Figure it out chick, I ain’t giving you my phone number and you ARE going to give me my money back.
It took a minute but she looked around the cash register like five times and punched in the store number.
Gooooood girl.
Here’s biscuit.
I get my shit, WITHOUT having to be asked if my vehicle has air conditioning and went out in the parking lot to put it on.
Oh fuck no, the hanger needed to be drilled out.
Get home, start to drill the hanger out and this happened.
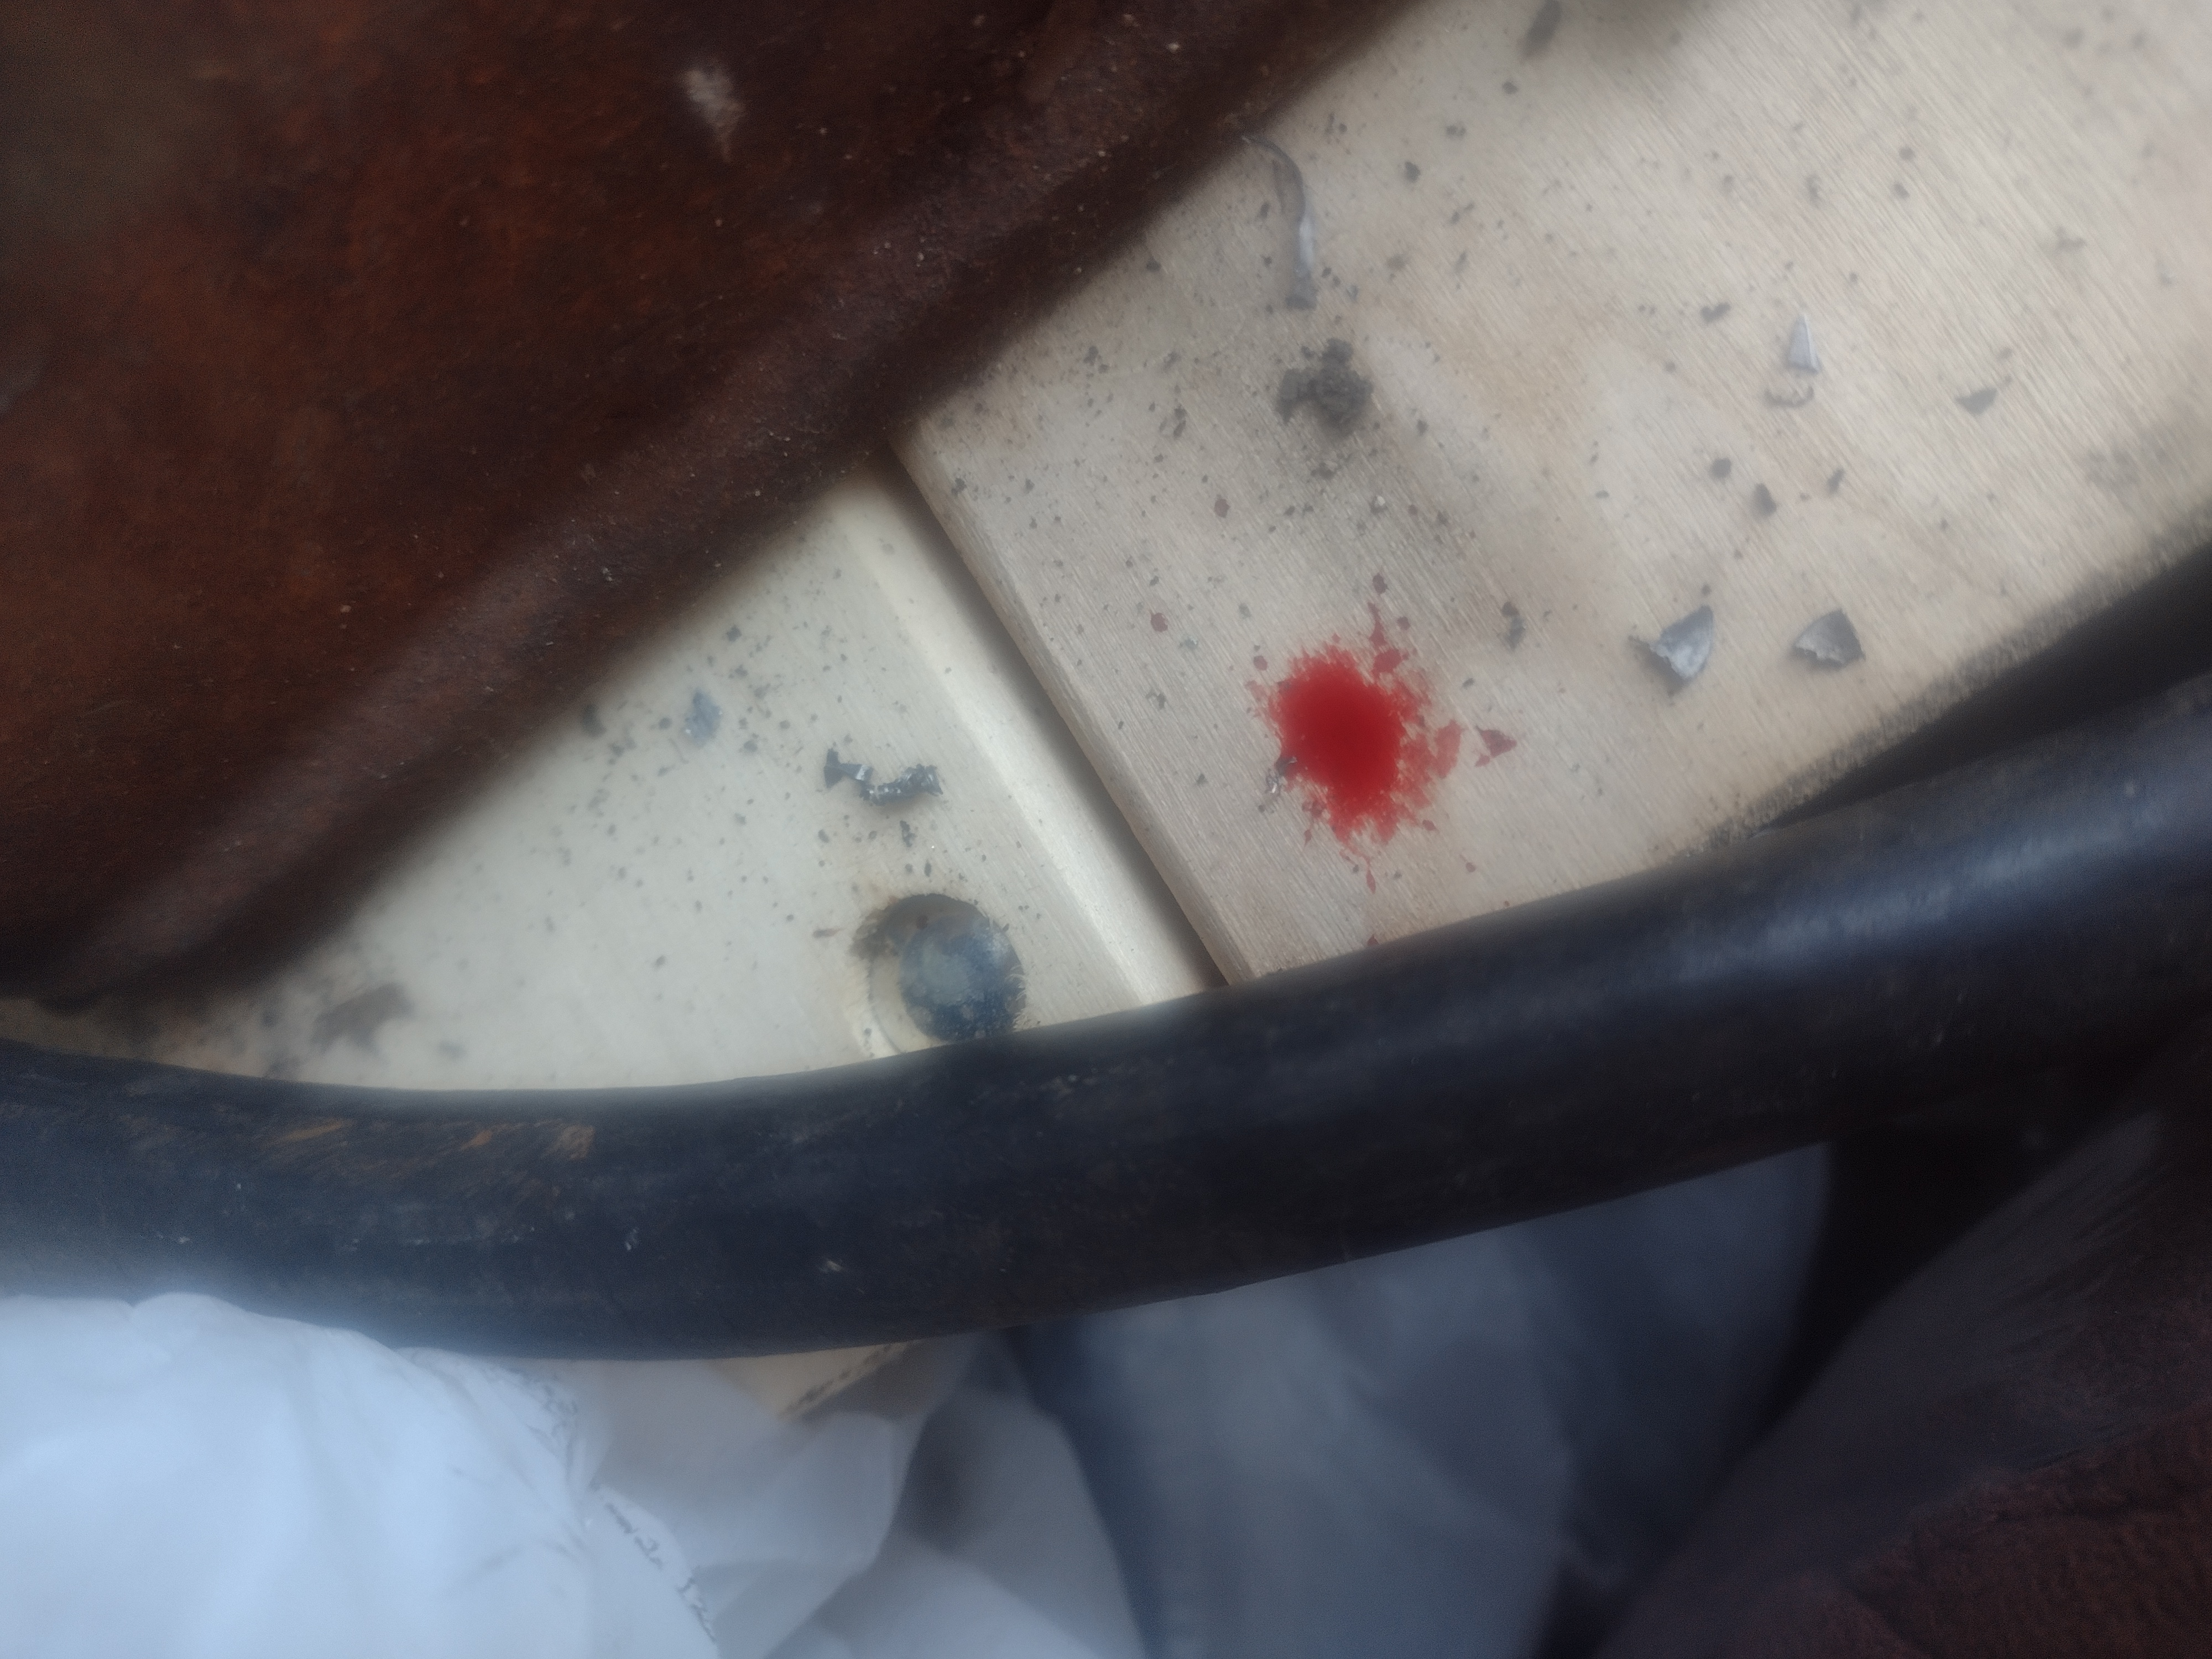
That was one of several dripped across the garage floor.
My own damn fault, I fucking knew better but it happened.
MORE CURSING and muttering.
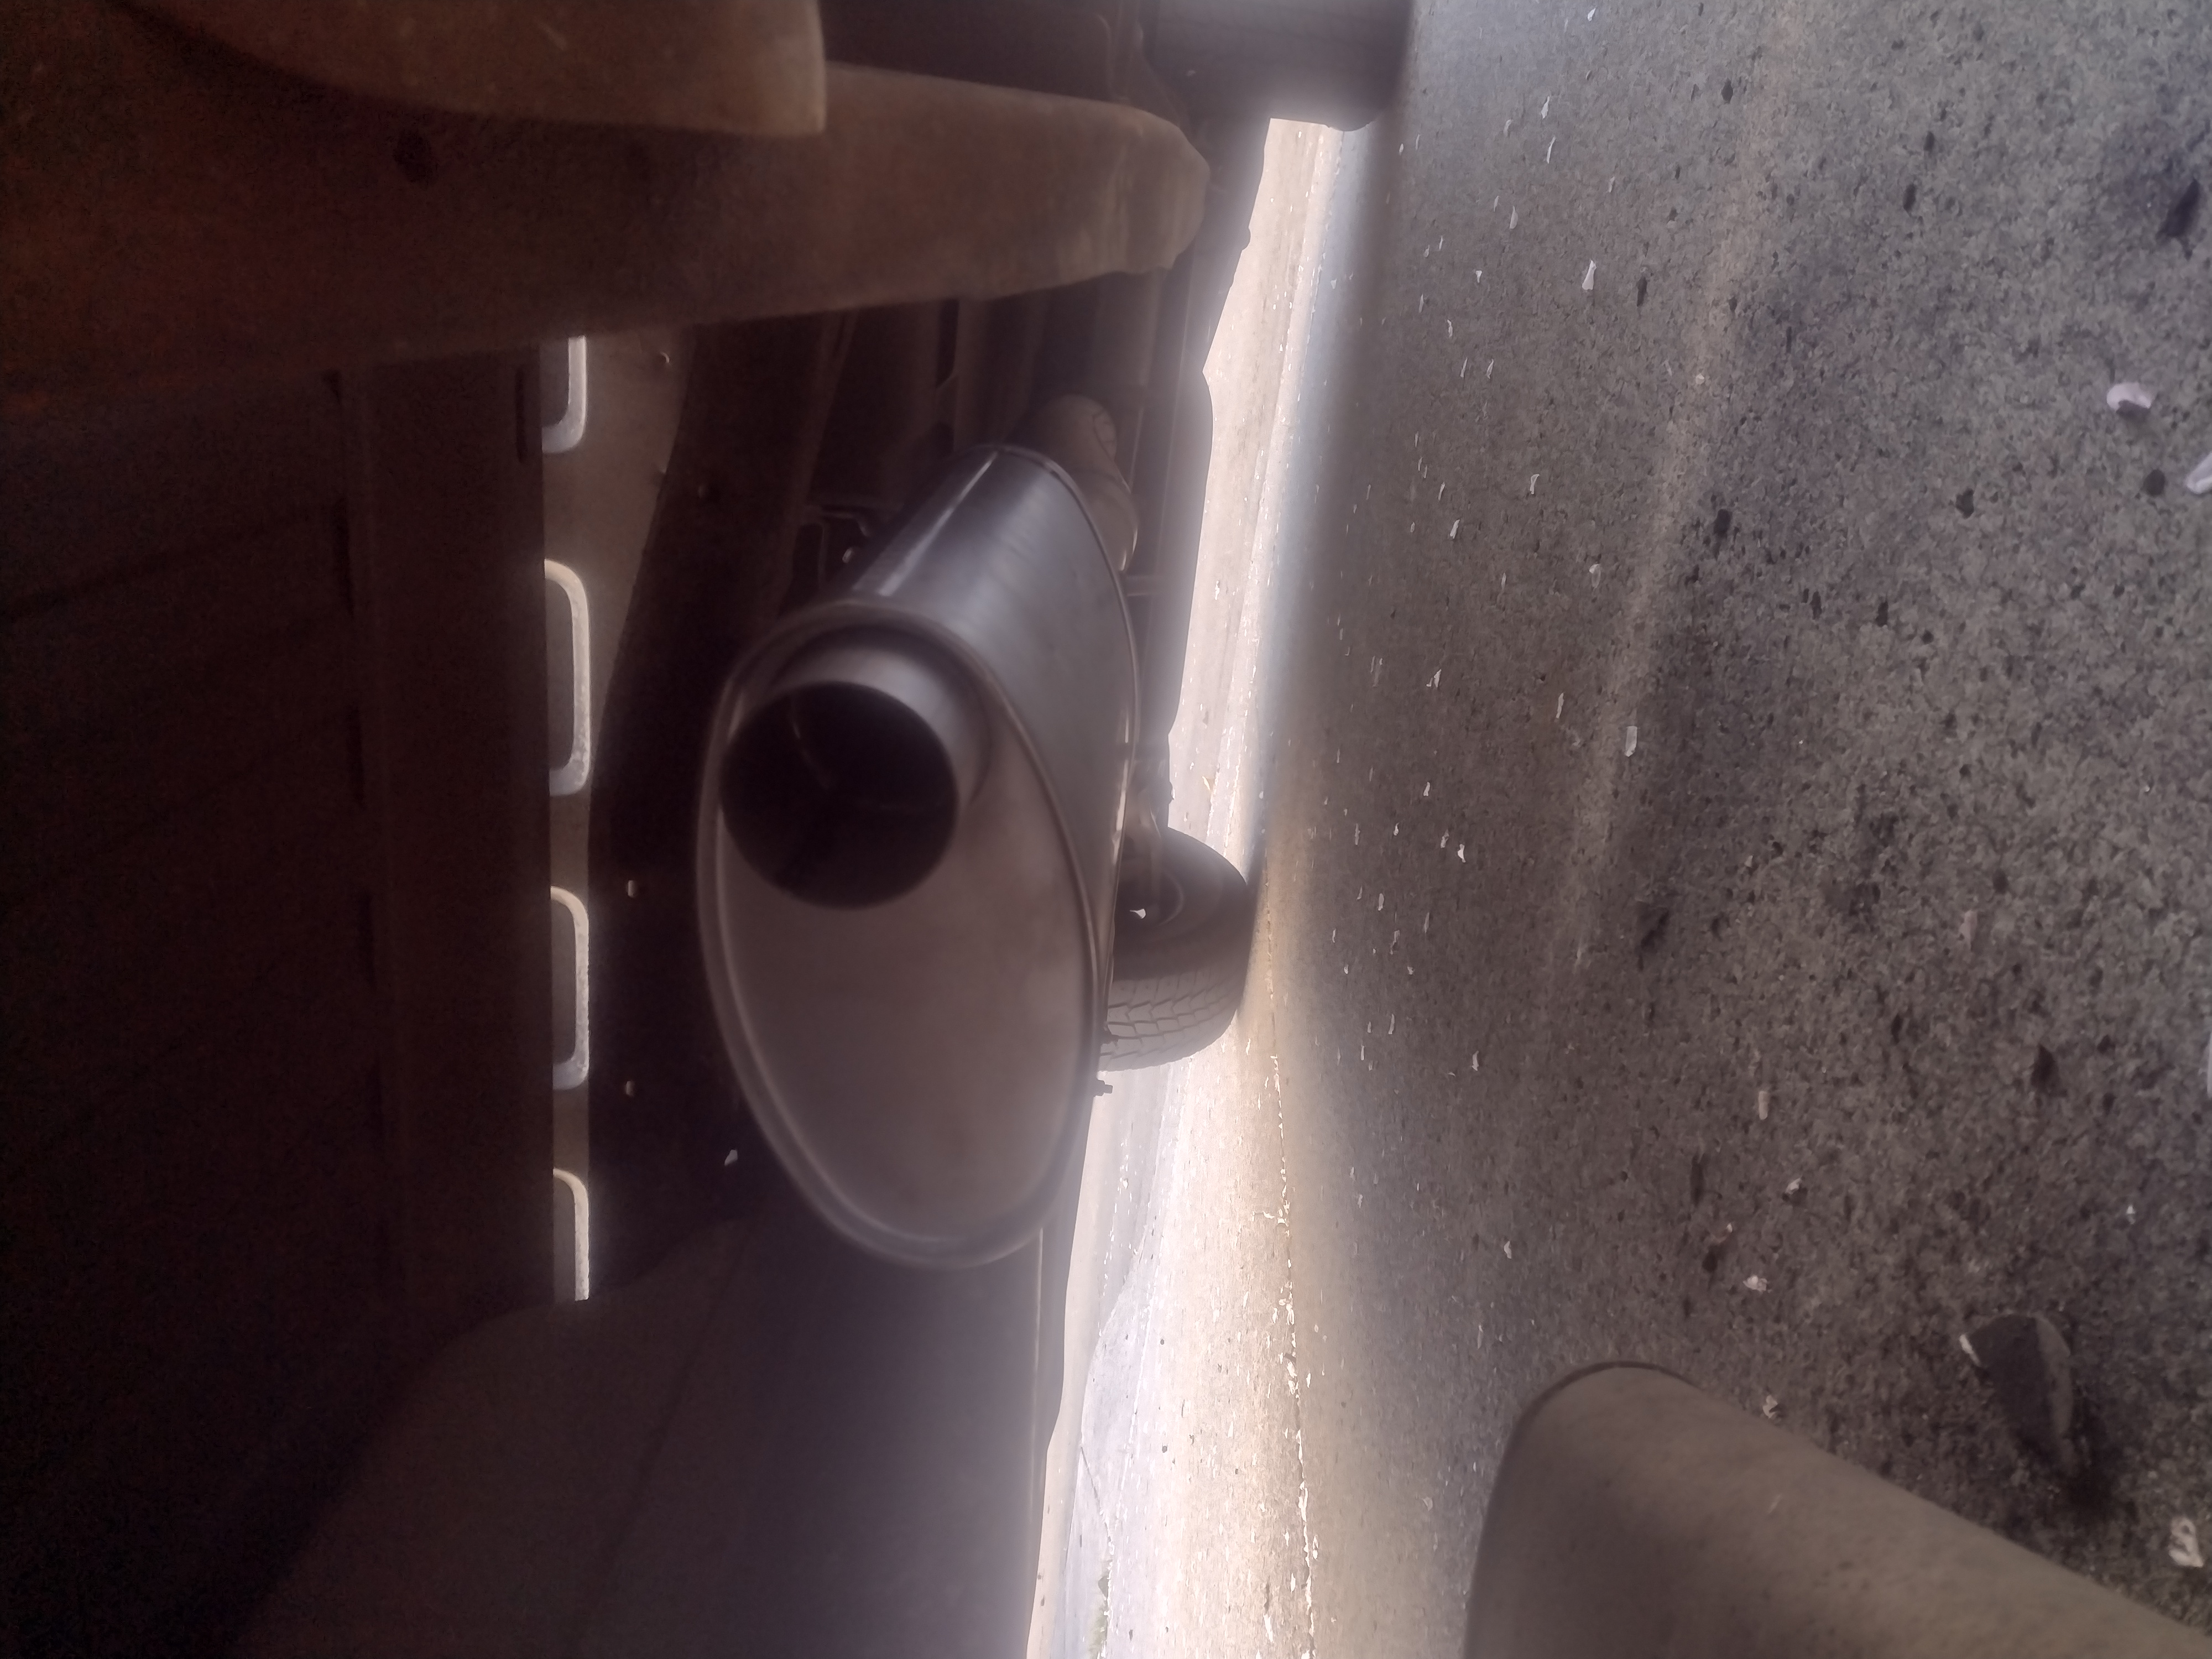
I finally got the fucker drilled out and installed.
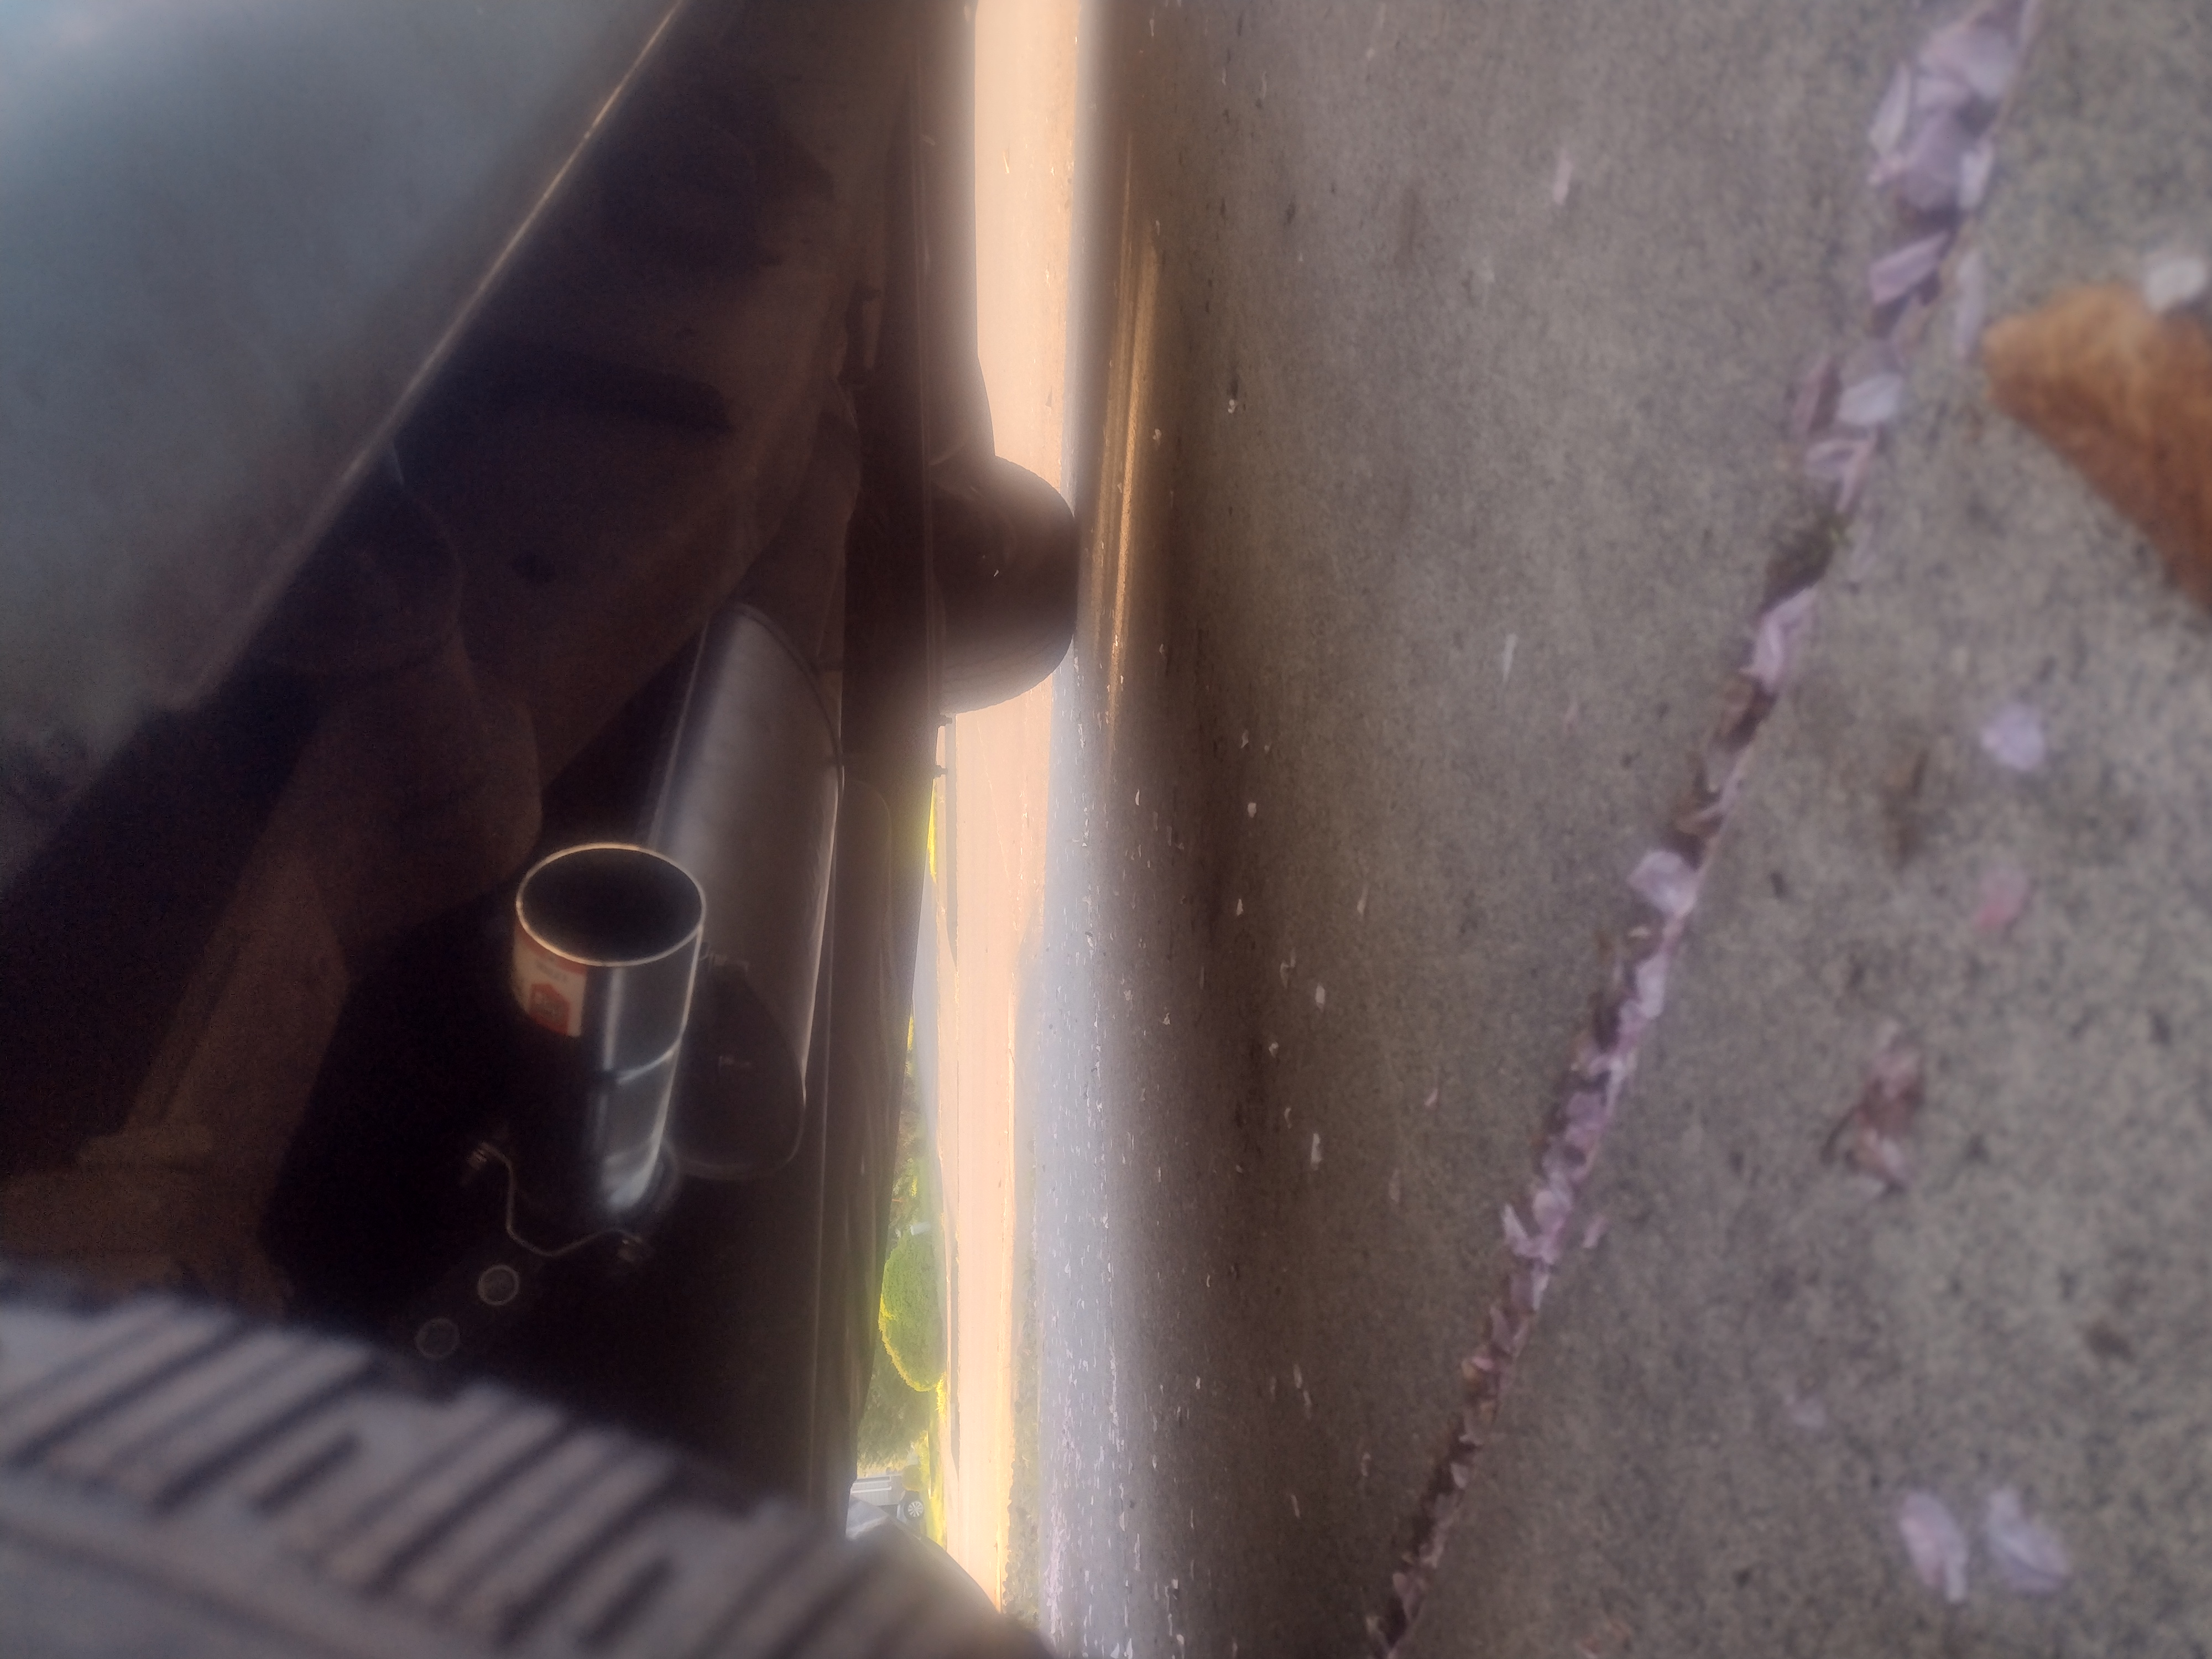
Sometime in the future I will find some chrome Doo Dad to put on the end of it so it sticks out just in front of the tire, but at the moment, it’s good enough for me.
It sure as shit didn’t cost me no $300 fucking dollars either.
The thing is actually quiet yet still has a bit of a throaty note, just slightly.

Fucking thing anyway.
So yeah, after all these years, I’m still a Genuine Red Neck.


You know it, I know it, They know it and TPTB know it.
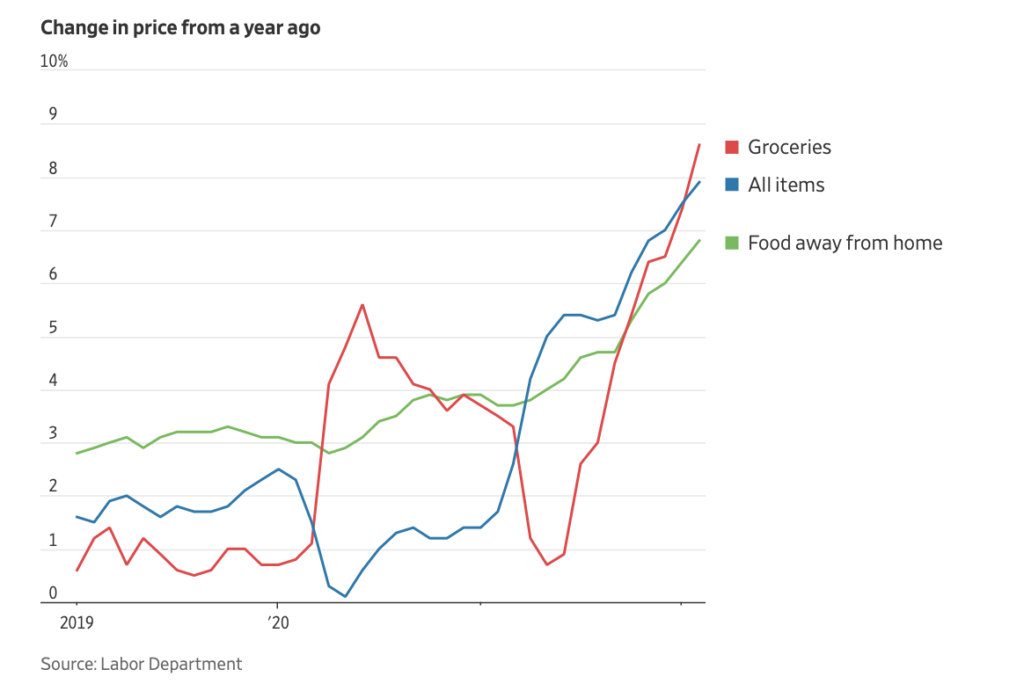
As inflation keeps eating the buying power of a dying dollar, they are buying less and less and less.
It’s just a matter of time until either TPTB have to massively increase the monthly stipend for those on Fixed Incomes and Food Assistance or All Hell is going to break loose.
Our grocery bill has jumped at least $100 a week already.
We aren’t special, that shit is happening to everyone.
Couple that with gas, oil and fuel increases of OVER 100% and the squeeze is on.
Quite literally, at this point my only question is WHERE it’s going to start.