
I Wonder How Many They Got ?

Wanna see my shocked face?

“Surprised and Concerned”: Poison Control Issues Nationwide “Toxic” Warning About Covid-19 Rapid Antigen Tests – Kit Includes Poisonous “Liquid Substance” Used Commonly in “Pest Control”
For months, there have been many people sounding the alarm over the at-home Covid-19 rapid test, saying that the kits include toxic substances that pose health risks – something that has been widely condemned by the establishment as a wild conspiracy theory.
Well, just like with most everything else these days, the difference between wild right wing conspiracy and fact simply comes down to a matter of time.
Now, even public health officials can’t ignore the dangers posed by these tests.
Earlier this month, the Ohio Poison Control Center issued a nationwide warning about Covid-19 rapid antigen tests after toxicology experts found the kits include a dangerous and toxic substance that is used most commonly in car airbags and pest control chemicals.
The poisonous substance in these test kits is called Sodium Azide, which has a “high” acute toxicity and can be fatal to humans in cases of overexposure, according to Stanford Medical. The presence of this toxic substance was apparently only found by Poison Control researchers after the winter wave of Omicron, which saw many Americans testing at home with the kits.
Following this uptick in at-home testing, according to WHIO TV7, drug and poison centers across the country experienced a large increase in cases involving Sodium Azide, which prompted the Ohio Poison Control to issue their warning.
The liquid Sodium Azide is located within the extraction tube inside the kits and the substance is colorless tasteless and odorless.
Cincinnati Children’s Hospital toxicologist Dr. Sheila Goertemoeller, who is a member of the Ohio Poison Control Center, spoke with WHIO7 about the agency’s decision to issue the nationwide warning. She explained that the other 54 Poison Centers in America have seen a similar upswing in Sodium Azide poisonings, amounting to “more than a couple hundred” across the country as of late.
Goertemoeller also admitted that her colleagues were “surprised” and “concerned” that such a highly toxic substance is being used in the test kits.
Nearly 60 million people have already received a free at-home Covid test from the Biden administration, most of which were passed out this winter, according to WHIO7 News.
At this point, the fact that why every prison in this country isn’t full to capacity with the fiendish bastards doing all this as they await trial on Mass Murder charges is my biggest question.
My next question is just exactly who among us hasn’t quite figured out that these fuckers are trying to kill you yet?
You gotta be one stupid sonofabitch if you haven’t by now.
There are links to the previous installments at the bottom of the post along with a download button.
This is an important aspect of successful gardening that is often overlooked.
Eye of newt, blood of bat
please remind me
where I planted at
Caveat Lector
This article started going the way of the last one in becoming way too long. I decided to break it up into sections. Some of the information may not make complete sense until you put together the info from all the sections. The sections will be –
– General propagation information (this article)
– Inbreeding Depression
– Collecting and storing seeds
– Cuttings, suckering, layering and grafting
– Specific practices for specific plant species
– Infrastructure considerations (planning and how to avoid the mistakes I’ve made over the years)
Also, in an effort to do my best avoiding getting overly technical in them, I’m going to knowingly cut some corners. What that means is while some of the following is not completely technically accurate, it will suffice for our discussion purposes.
And, all these articles are predicated on the growing of plants commonly used as a food source. So while, according to Euell Gibbons, “many parts of a pine tree are edible” and there are a lot of plants that grow in water, this information is directed at plants normally grown as garden foods in soil.
Finally, while I strive to provide you with sound information it is beyond my ability to completely explore every topic I touch on. Ideally it is my hope that exposing an idea or concept will provide you a launch point in your own exploration and research. Considering as the intent of these articles is to get you thinking about growing food AFTER TEOTWAWKI, you should be looking at the plants you intend to grow and researching them now, rather than when you have limited resources to perform your research.
Just to remove the question of what my corner cutting might look like, an example would be –
expressing a flower may have both a stamen and pistil when in actuality it would have a stamen and carpels which when partially or totally joined (the carpels) form the pistil. A stamen produces pollen grains, each of which contains a male gametophyte and the carpel at maturity houses the ovule which contains a female gametophyte. This female gametophyte, when fertilized with a male gametophyte becomes a seed. Pollination may occur as a result of self pollination or cross pollination. The preceding ignores completely the discussion of double fertilization, which is what actually happens during the fertilization process.
Contrast the above with the following.
Many, perhaps even most, flowers have both a stamen and pistil. The stamen fertilizes the pistil. Many plants can either self pollinate or cross pollinate.
Though not technically accurate the second example is more than sufficient for most of our needs. Just remember though, that when we generalize, we run the risk of overlooking the exceptions to the rule and I am certainly vulnerable to falling into that trap.
Enough of that and on with this article.
…..
Preamble
In order to successfully grow food year after year we have to understand plants reproductive processes, whether they are an annual or perennial, how to maintain genetic purity and variability of our stock and what we need to do to manage this process to our advantage.
Summarizing the above we have two broad topics of exploration. On the one hand we need to understand our plants and their reproductive cycle and on the other we need to understand the mechanics of the act of propagating plants.
Propagation
It is beyond our scope here to cover every plant that is grown for food. You will need to do your homework and research the specific varieties you grow.
Most naturally occurring plant propagation resolves down to two basic types, sexual and asexual.
Sexual reproduction consists of the fertilization of a blossom by pollen (pollination). Examples are just about every plant you can purchase seeds for. Don’t overlook the non obvious ones like onions (included because most people don’t start their onions from seeds, but from sets or transplants.). Many plants have both male and female reproductive organs, whether male and female flowers or both gender parts being contained in the same blossom. Some plants, like kiwi, actually have gender based plants so if you plant three kiwi and they’re all male or all female plants you just have an ornamental. Again, you need to do your research on the plants you intend to grow.
Asexual reproduction (also referred to as vegetative reproduction) takes several forms which include tubers, bulbing, rhizomes, runners, sporlation, buds, layering and suckering. Some examples of these are potatoes (tubers), raspberries (suckering) strawberries (runners) and marionberries (layering).
Artificial propagation consists of methods such as grafting, cuttings and tissue cultures among others. A common grafting example is fruit trees (apple, peach, pear). Rhubarb, potatoes and blueberries are examples of cuttings. Tissue culturing is going to be beyond the means of most individuals post collapse and unless there is a huge demand for more info this is probably the last time I will mention it. The biggest benefits to tissue culturing is the ability to obtain a genetic clone of the parent (completely sidestepping concerns of inbreeding depression) and providing initially disease free plant stocks.
Ok, now that we know some means of plant propagation our next step is to understand plant reproductive cycles. This is another one of those areas where I’m going to generalize.
Most annuals are plants that have a complete life cycle from seed to seed in one year. Examples are corn, tomatoes, peppers, lettuce and pole beans. Some of these break the rules. In the case of lettuce, it grows so fast and goes to seed so quickly you could probably grow a few generations over the course of one growing season. Peppers are actually a perennial but they usually don’t survive the winter season where most of us grow them so we treat them as annuals. I have begun overwintering super hot chili pepper plants to get a jump on a growing season that is usually too short to see them reach maturity, even when starting seed as early as the first of February.
Biennials are plants that grow one season and seed the next season. Carrots, beets and common onions are an example. They grow one year, produce a bulb, go dormant and then the next year grow again producing flowers and seed. Actually onions are kind of an exception to a lot of rules because it’s not really years they go by but cold cycles. This is why if you put out your onion transplants early and then after awhile have a cold snap you may have some of your first year onions go to seed. The cold snap tricks the onion into thinking it has gone through a winter and fools its biological clock.
Perennials are plants that live and produce for more than one year, often for several or more years. Rhubarb, asparagus, garlic, horseradish and collard greens are some examples, so are many herbs. Some other perennials are many soft fruits, strawberries, raspberries and marionberries to name a few. Raspberries and marionberries break the rules too, because while they are a perennial, their fruiting cycle is biennial (well most raspberries are, there are some exceptions here as well).
Ok, now that we have a small grasp of plant propagation and reproductive cycles we need to go back up several paragraphs to where I mentioned pollination. Pollination either occurs abiotically, without insect involvement, or biotically utilizing insects (actually there are other pollinators than insects). A common abiotic pollination method is wind and a common example is corn. Biotic pollination examples are most flowering plants. Biotic pollination accounts for nearly ninety percent of all pollination.
Both of these methods of pollination are very susceptible to cross pollination. Though I’ve dealt with cross pollination to a degree in a previous article we’re going to examine it again here. Cross pollination can be a great boon to your efforts in maintaining genetic variability in your plants and seed stocks. It can also be the cross you bear when similar plant species cross pollinate leading to an undesirable result. Most of the time, especially right now today when we can purchase all the seed we want, cross pollination for the most part is not an issue. It does become an issue when you begin to collect your own seed. Corn, onions, sweet and chili peppers and tomatoes all easily cross pollinate with others of their species. Did you know your zucchini and pumpkins can cross pollinate? How about this one, your carrots and a non crop plant, Queen Anne’s lace? Those will be some nasty carrots let me tell you. If you are counting on that great sweet pepper remaining sweet over the years you don’t want it cross pollinating with a chili pepper.
To maintain the integrity of your seed stocks you need to practice methodologies that ensures the genetic pureness of your plants. As far as I am concerned from a practical standpoint you have two means of insuring the integrity of your seed, monoculture planting or isolation (either distance or physical).
Monoculture, though effective, suffers from the severe problem of greatly limiting what you are going to grow. I can not envision only growing one variety of anything in my garden.
Distance isolation is just that, planting easily cross pollinated varieties far enough apart they can’t cross pollinate. This methods limitation is spelled out in its name, distance or more appropriately minimum distance. Here’s something that will bend your mind a little. The minimum planting distance for isolation of heirloom tomatoes is greater than that of hybrid tomatoes. Why? Answer, because the flower structure of heirloom varieties is different in a way that encourages cross pollination. Humpf, who woulda thought it.
It can be very difficult to come up with the safe minimum planting distance to avoid undesirable cross pollination. The USDA tells us for OP (open pollinated) corn the safe distance is one mile. Tomatoes is thirty feet, peppers is thirty feet, honeydew melon is a quarter mile. Did you know honey bees can fly up three to five miles to forage? Guess distance isn’t going to work so well for most of us if we want to be sure our seed plants don’t cross pollinate. Don’t overlook the impact your neighbors gardening efforts can have on your efforts, especially if you decide to monoculture and then find out he is growing a different variety of the same species.
That leaves physical isolation. You can make physical isolation as simple or complex as you like and it can vary from an isolation bag over one blossom to positive pressure structures utilizing air filtration and air locks on the entry ways and having their own group of biotic pollinators.
I like simple and cheap so lets look as using isolation bags. These are open weave bags allowing light, air and water to pass through but blocking insects and drifting pollen from doing their job. With some plants like chili peppers you can put an isolation bag over a blossom and forget about it. It will self pollinate as the blossom opens. That is not to say that chili peppers don’t cross pollinate they do, very easily I might add.
With other plants you will need to help the process along by capturing some pollen from some of your plants and transferring it to your other plant blossoms. For smaller blossoms we use small natural bristle paint brushes. Each species of plant has its own brush kept in a zip lock bag. In some cases even an individual plant will have its own brush. It all depends on the degree of control you want in maintaining isolation. We also wear latex gloves that are changed for each plant or species group, again depending on the degree of isolation we want. We will lightly twirl the paint brush in several blossoms (source plants) and then move over to the blossoms we want to pollinate (destination plant). Another light twirl in the blossom and we’ve just knocked mother nature out of the process.
On larger plants (think corn) we employ a shaker bag to collect the pollen and then move this bag over to the plant we want to pollinate and close the bag around the ear and silk and shake it like mad to get the job done.
We make our own isolation bags out of summer weight floating row cover material. Basically they are shaped like pillow cases with a tie loop on the open end. They are sized from an individual blossom all the way up to a whole plant. Once we pollinate we leave the isolation bags in place for awhile then we remove them. We do flag the individual blossom, stem or plant that we have pollinated so we know what we are going to collect for seed.
There is a procedure we follow when doing the above process. We place isolation and shaker bags before the blossoms begin to open or pollen forms. This is done on both our source and destination plants. Once we have blossoms and pollen we will perform the pollination. The isolation bags are left in place until fruit begins to form. After that we’ll pull the bags. We tag the bags so if we reuse them in the future we know which plants pollen was previously in the bag. We attempted to clean and sterilize the bags but it was more effort than just making new bags each year.
Yes the above is a lot of extra work but if it ever goes to hell in a hand basket, several years down the road, if you are still alive, you’ll thank me for this info.
So to wrap up this weeks installment, you need to know what you are going to grow, its reproductive cycle, how it reproduces, how you are going to isolate your future seed stock plants and the methodologies you are going to employ to maintain the integrity of your seed stock plants.
Links to previous articles
A food growing primer https://bustednuckles.net/a-special-treat-food-grower-articles-resurrected/
The foundation of it all -this thing called dirt https://bustednuckles.net/food-grower-article-2/
Starting Seeds https://bustednuckles.net/the-food-grower-series-continues-seed-starting/
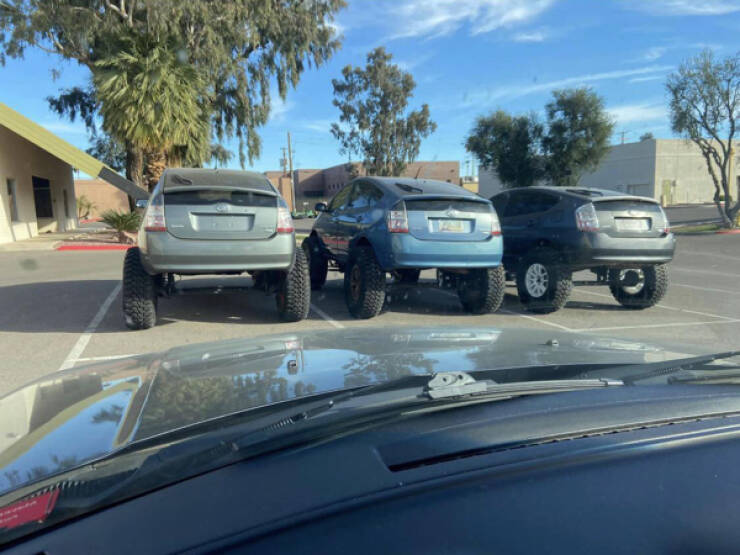
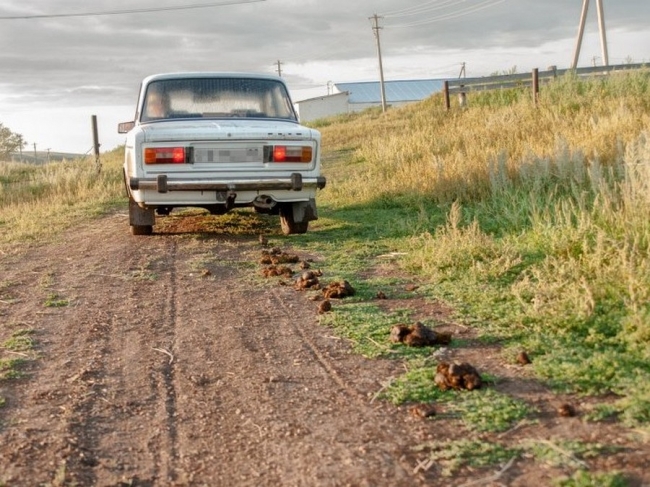
Seriously, why freaking bother?
The stupid things are front wheel drive and have a damn straight axles under the ass.
We have?
I thought so, just making sure.
BECAUSE WE ALL KNOW DAMN GOOD AND WELL WHAT IS COMING RIGHT ALONG WITH IT.

Image from Zenger News.
“The Toilet Is Plugged”.

Sooner than expected.

Let’s just dive right in shall we?
If this is too difficult to read, hit the + button and you can blow it up.
You can also just DOWNLOAD the file and save it to read at your liesure.
I had a lot of trouble trying to get it to fit from a PDF file so my apologies.
Me?
Yer damn right I am.
And A Job!
So You Can FEED ME!


Well, once again it’s like one step forward and two steps back but not quite.
I did make some progress on the little bastard but in the process discovered some more issues.
No surprise there.
I did manage to get it cleaned up some, that whole engine was just a dirty, greasy, filthy PIG.
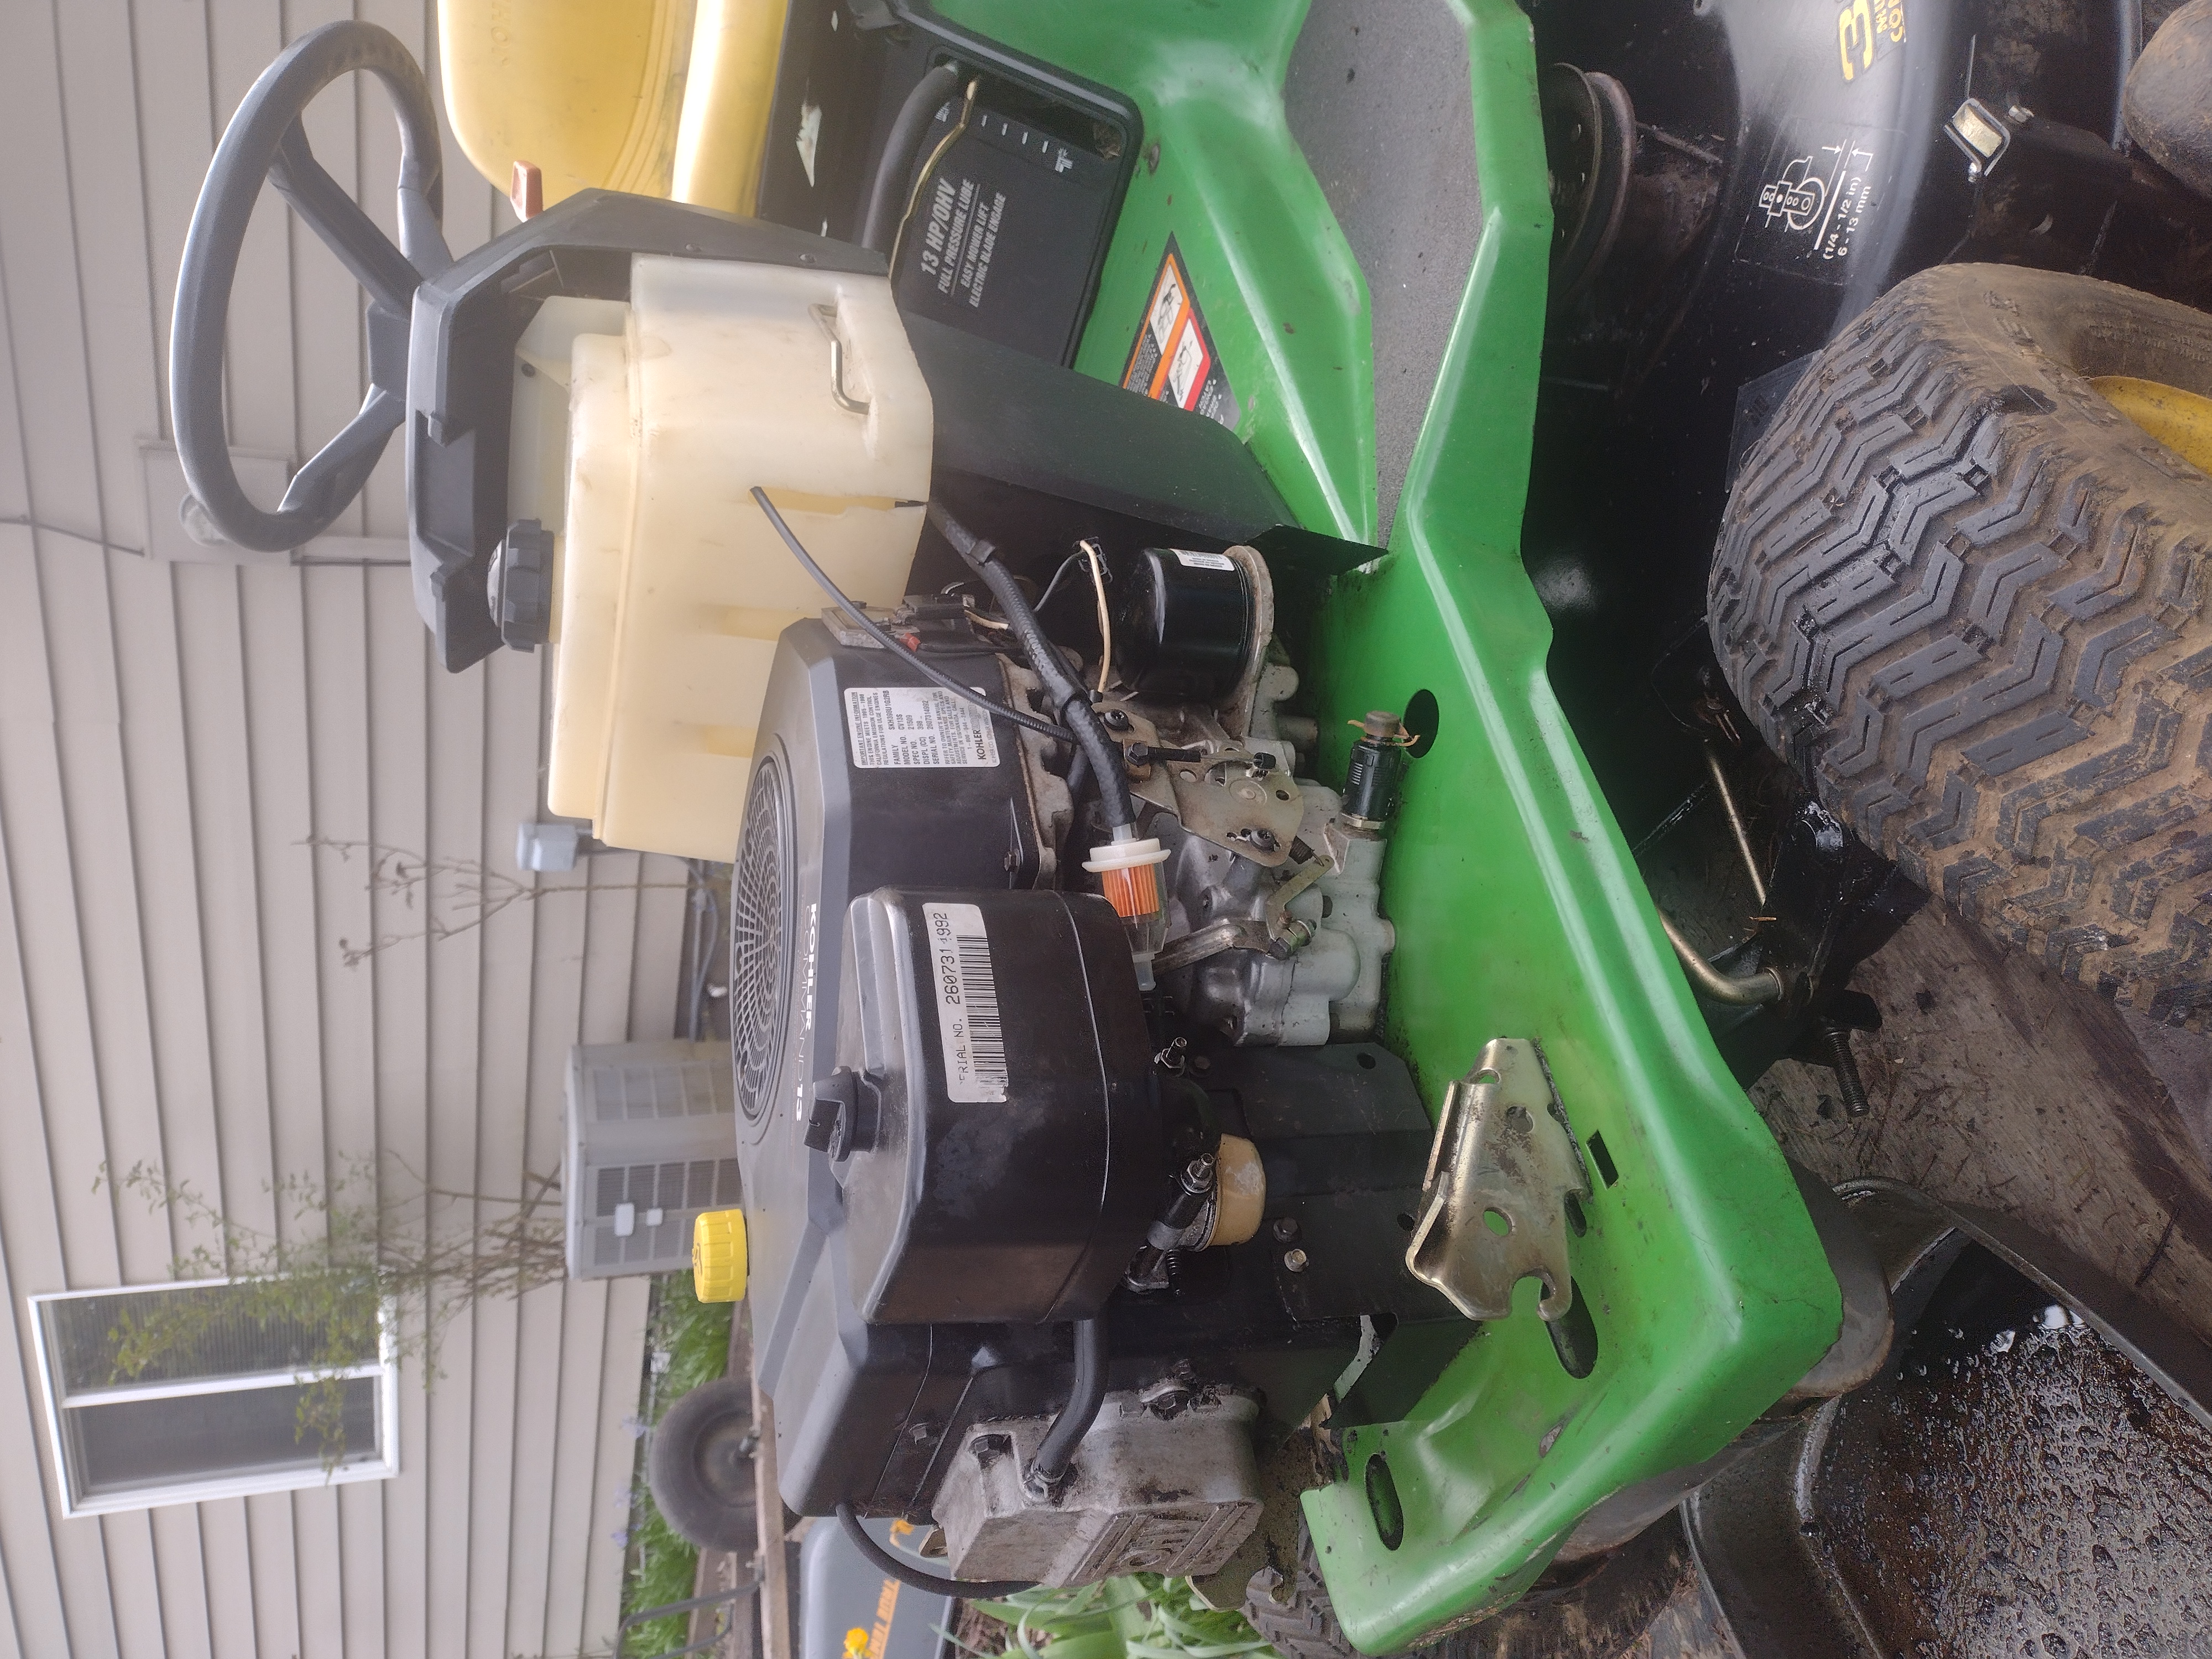
Then I made a huge mess trying to drain the gas that had a little oil in it out of the crankcase.
Thin?
Oh yeah. You can see the oil drain tube sticking out over that hole in the middle at the bottom. It has a push and twist valve that allows the oil to drain out.
Ostensibly through that little hole they put there just for that purpose.

OH HELL NO.
That shit started shooting out of that tube all over the mower, the trailer it is sitting on and me.
Then it ran all down under the cowling and down the side step, dripped through that hole and ran all over the mower deck too.
The little drain pan I had under there maybe, MAYBE, got two fucking tablespoons full of oil in it before I grabbed ahold of that damn valve and cranked it shut.
What a mess.
Dirty bastards.
After I cleaned all that up I changed the oil filter and filled it back up.
I had the gas tank off cleaning it up, the previous owner had yanked the fuel line out from under it for some reason.
I bought some new fuel hose, clamps and an inline filter and put all that back together.
While I was scrubbing scraping and cleaning the engine I noticed a couple of problems that I am going to have to take care of.
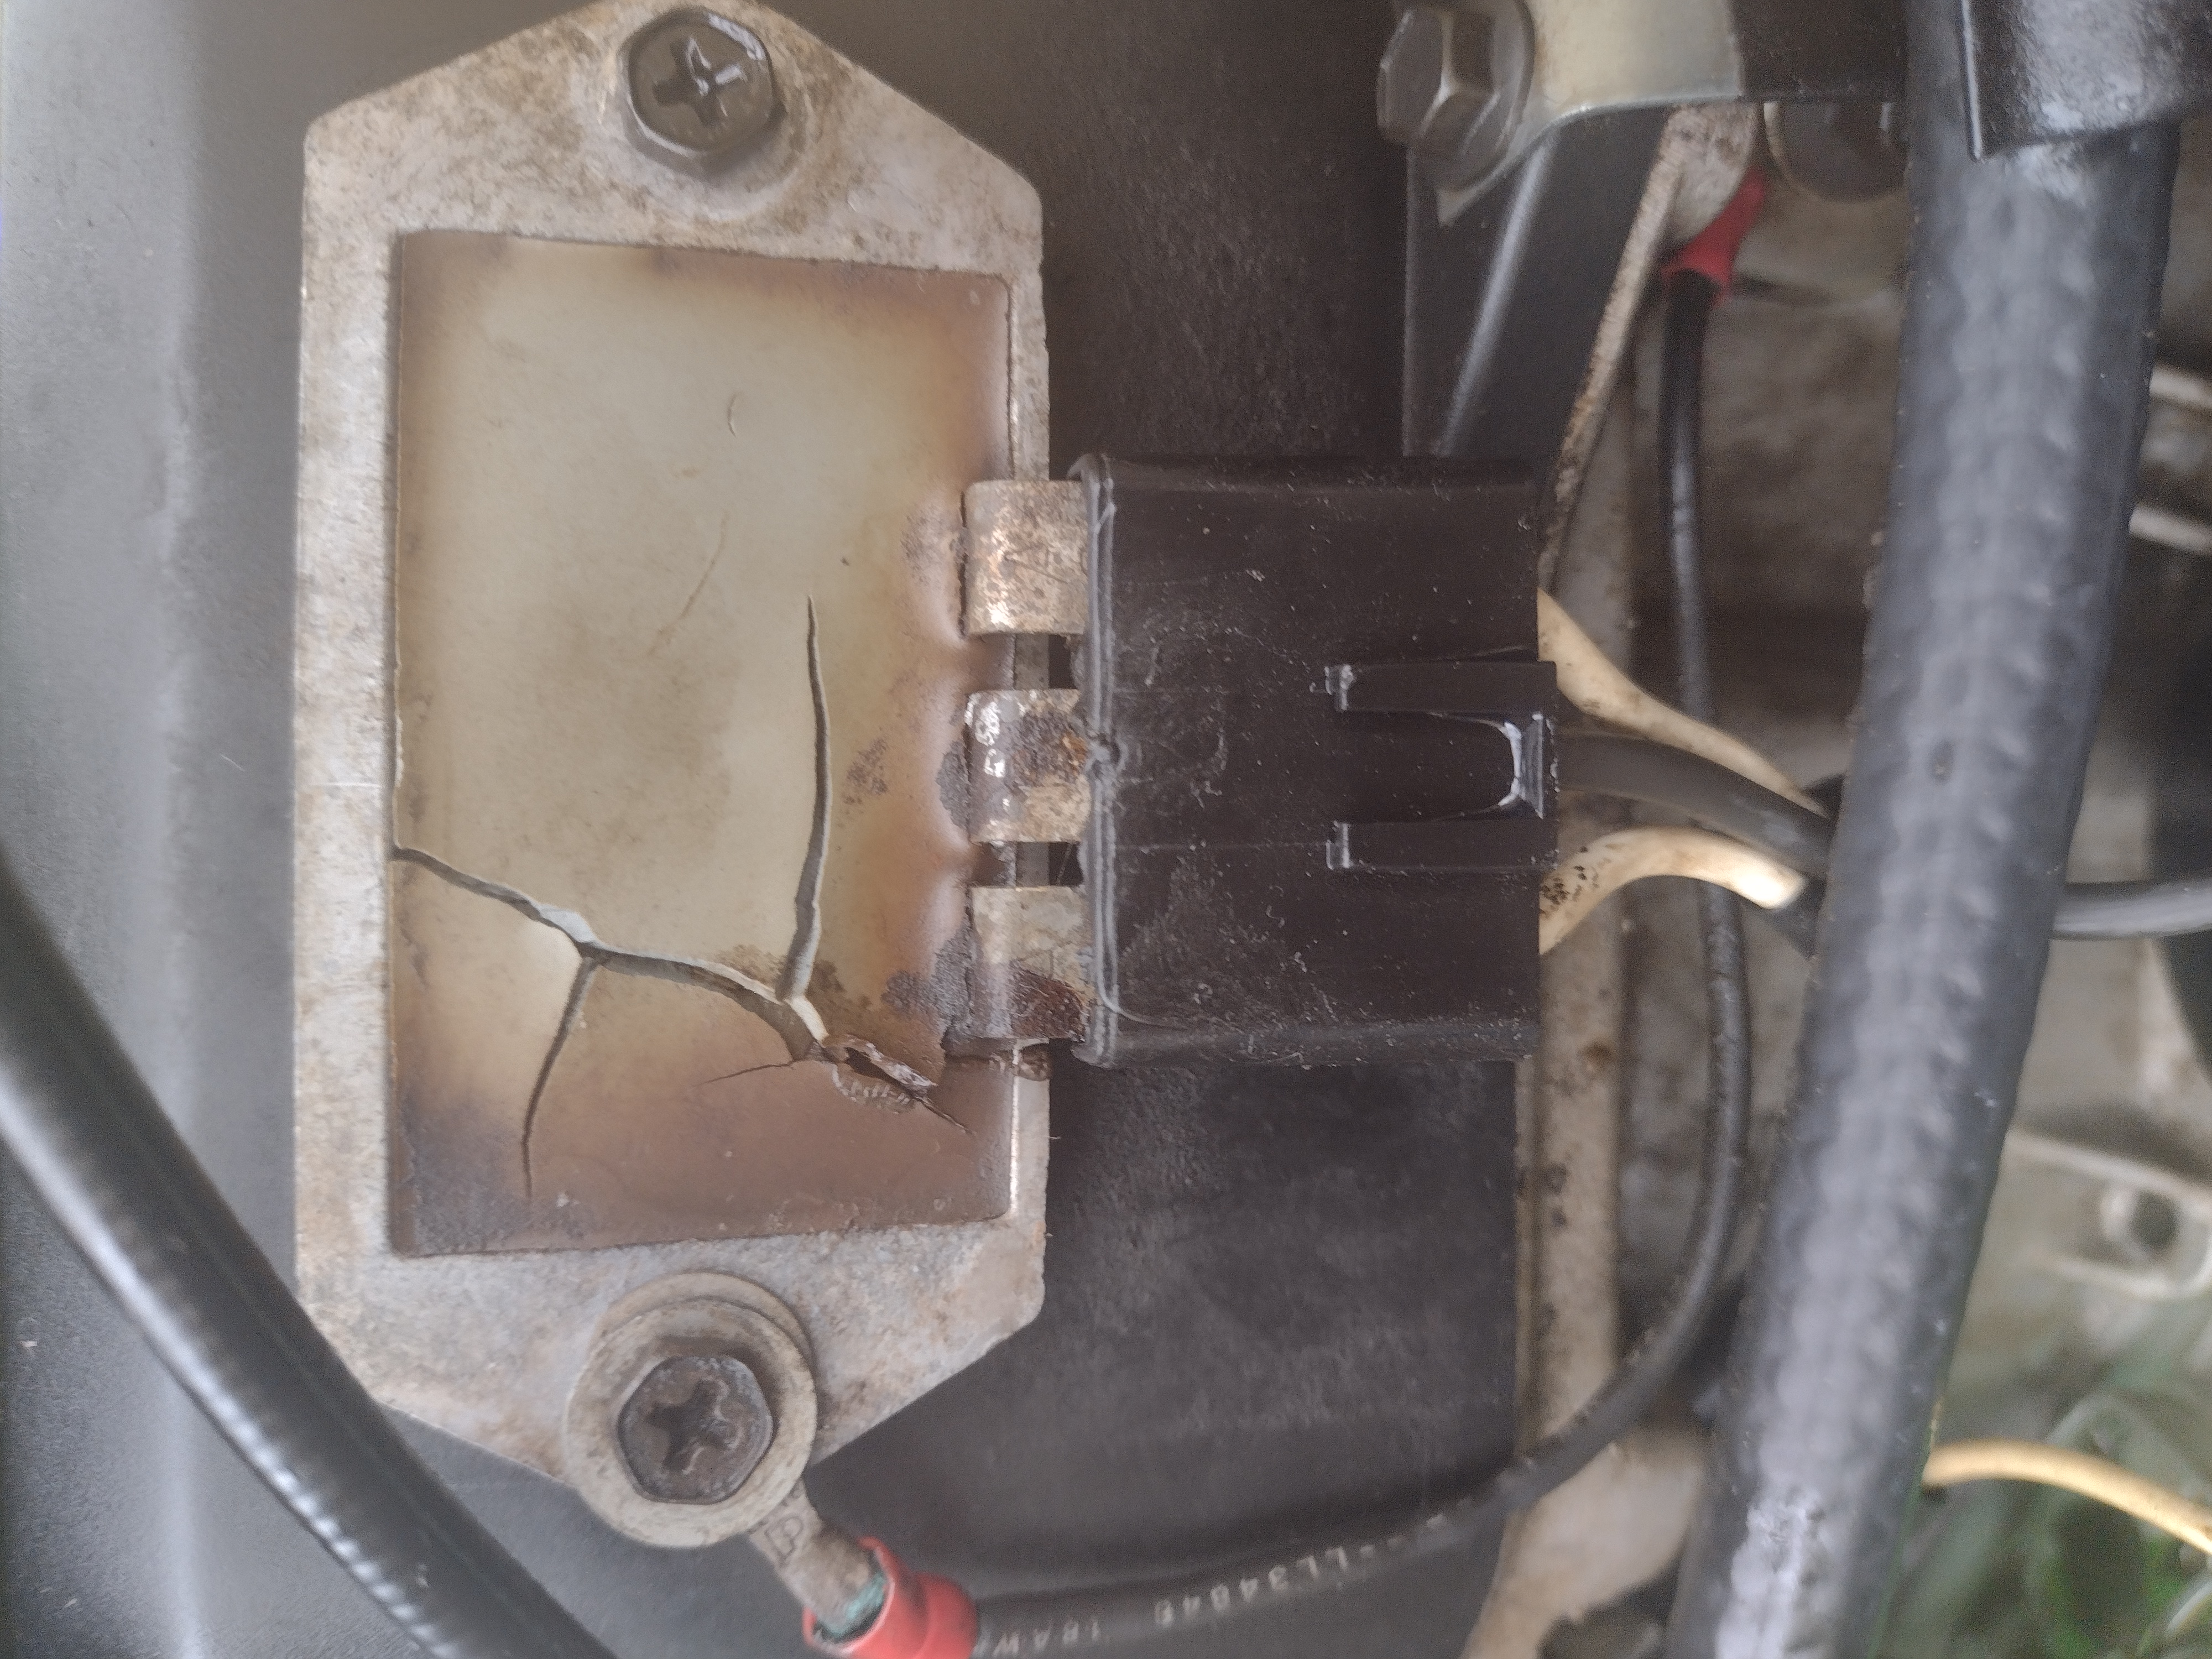
That ain’t good and neither is this,
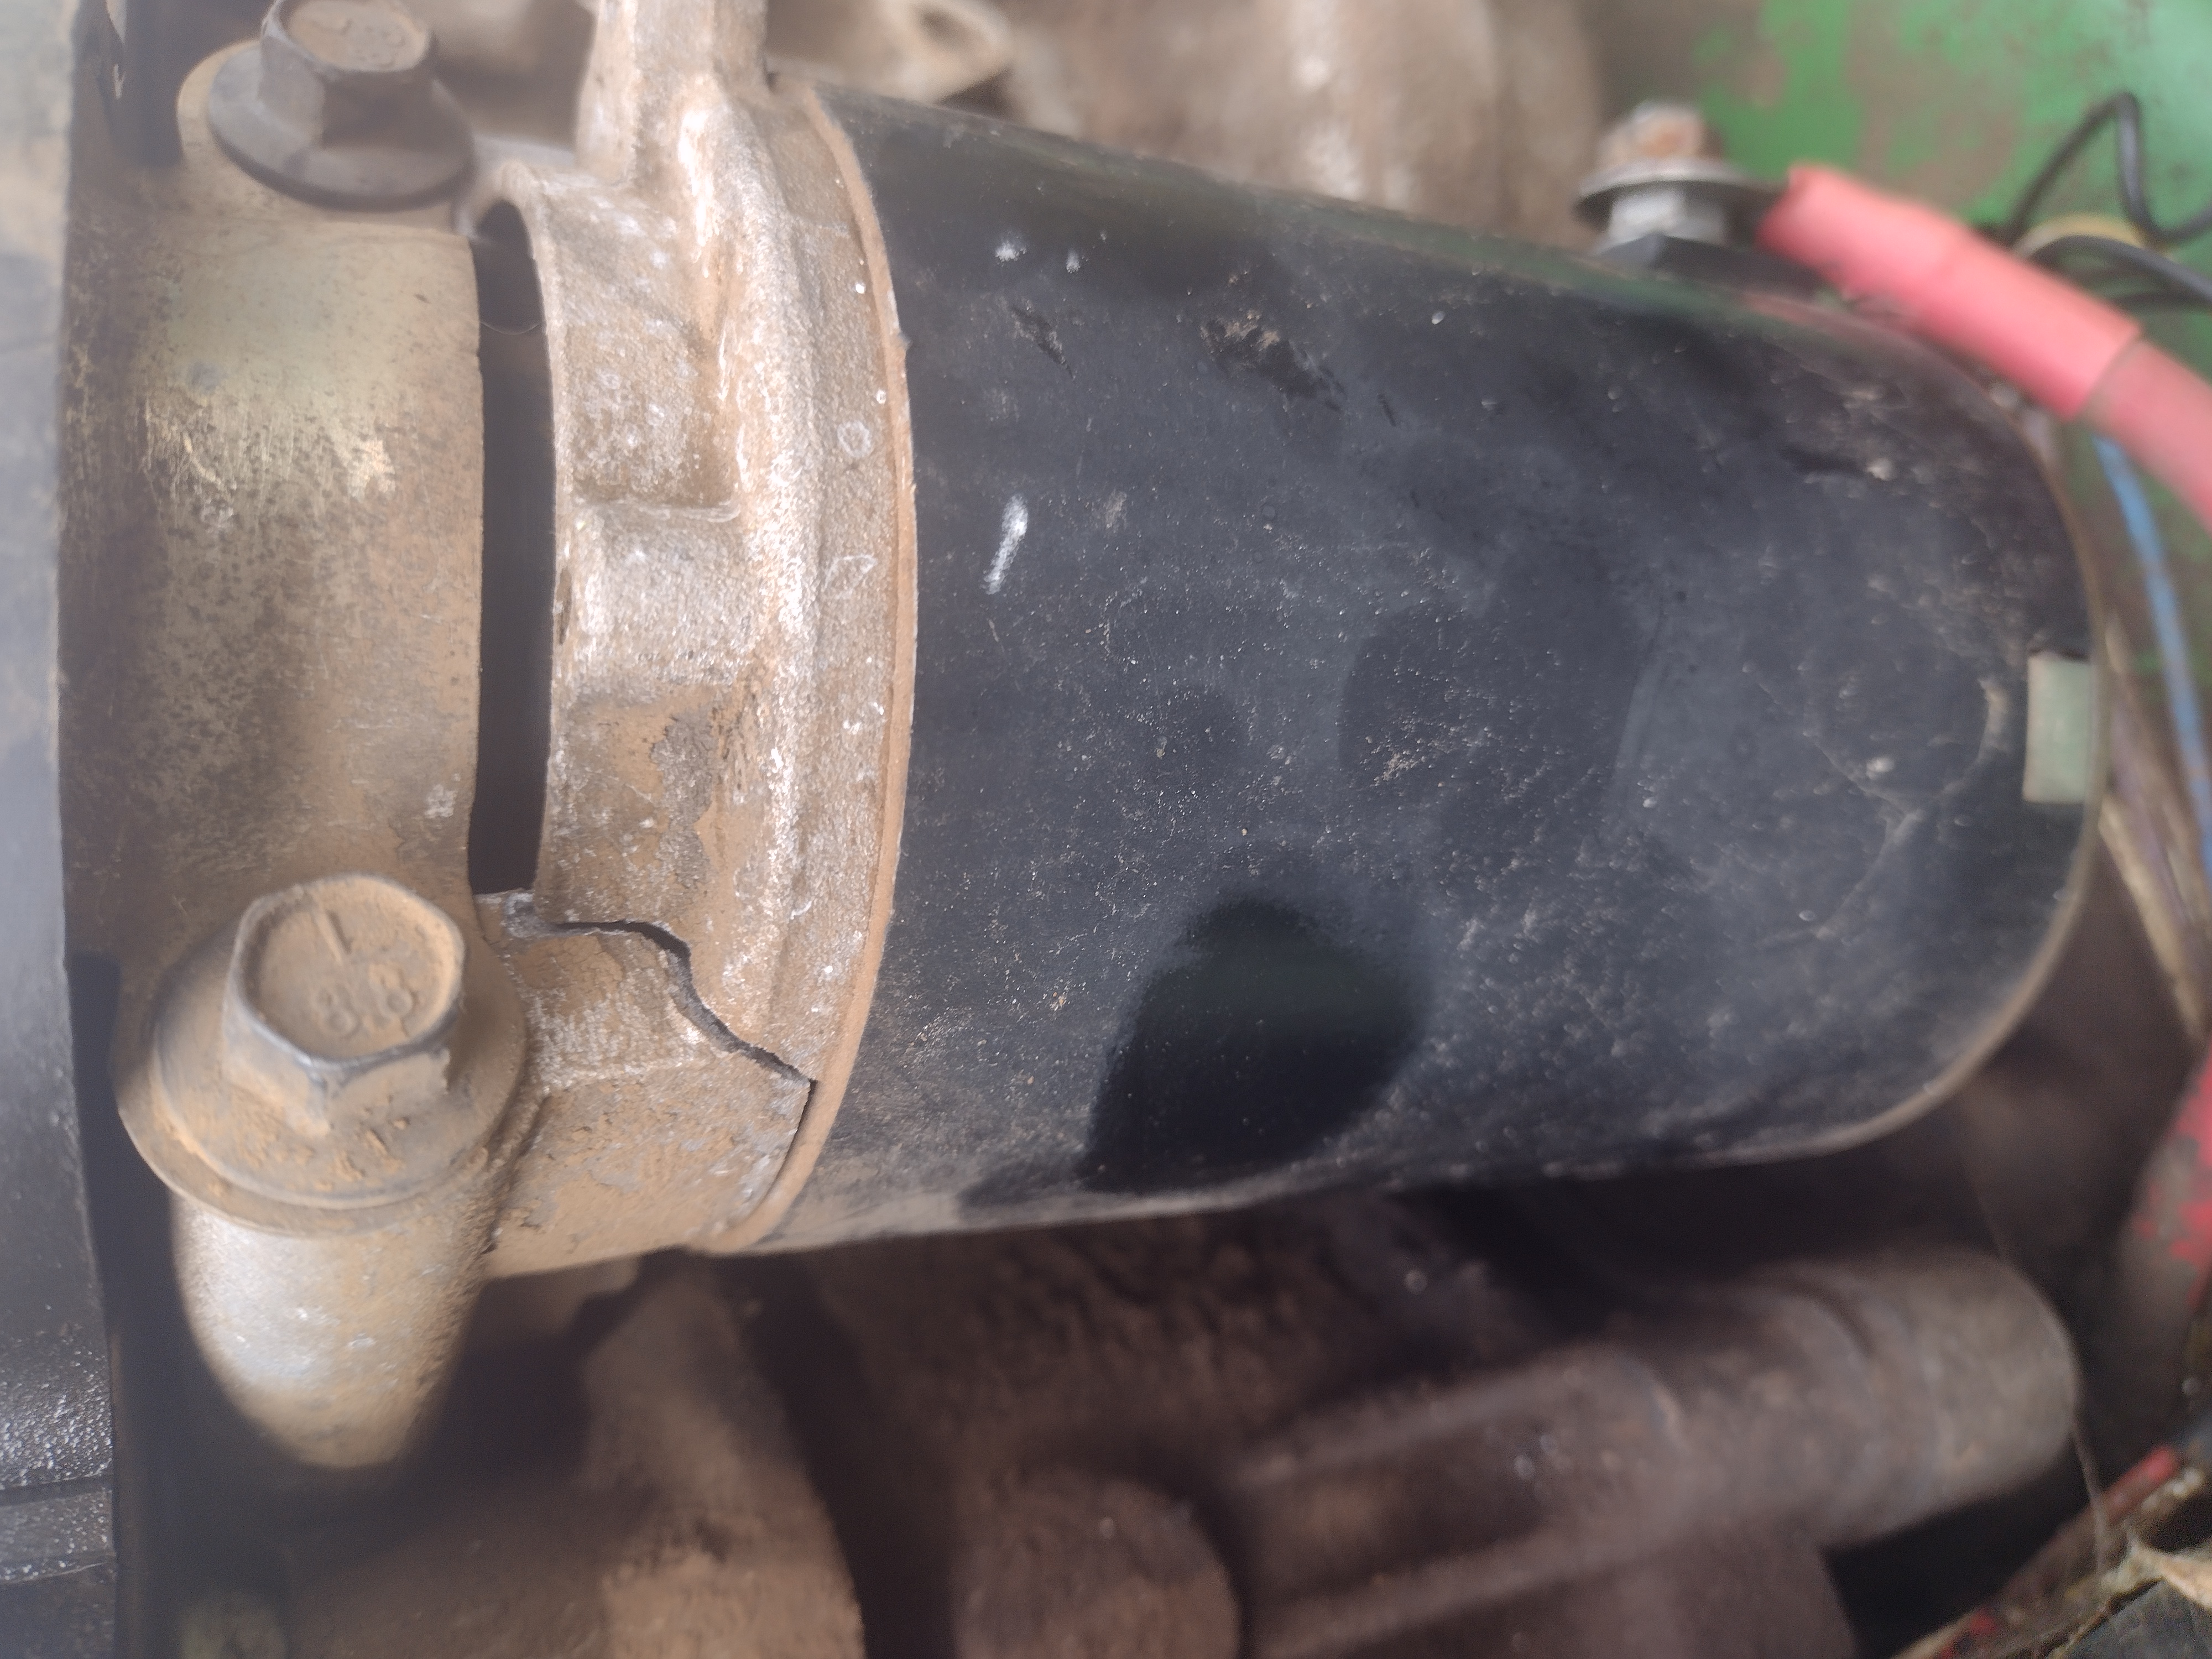
The starter seemed to work when I jumped the solenoid the other day so I am going to hold off on that.
That smoked out voltage regulator is another story.
I got online and checked the local John Deere outfit and had another laughing fit when I saw what they wanted for one of those.
$105 plus tax.

Yeah FUCK THAT.
FleaBay here I come.
This is more like it.

Can you say MARK UP??!!
Holy shit.
I already had to order the switch that controls the electro-magnetic clutch for the mower blade assembly. The starter circuit also goes through that S.O.B .
The clutch circuit appeared to be working but I was getting juice from the Start position on the key switch going in but nothing coming out.

I see I got burned on that bitch too, I paid $40 something for it and they are less than $15 on FleaBay for cheap knock off’s.
Ah well.
While I was cleaning up all that oil I happened to have to take a look underneath the damn thing and found a pin missing that holds an arm for the height adjustment of the mower deck under the ass end,
More Fiddle Fartin’ but I managed to find a nut and a bolt that fit for now until I can find the right pin and retaining clip.

That will be easy enough.
Getting the deck lined up again took care of the problem with it interfering with the left front tire when turning.
Oh there is lots and lots more to do to this thing, trust me.
As much as it scares me, I am going to take a look see as to the availability of either e REPRO or a used hood for it too eventually.
The one on it is too fucked up to try and fix.
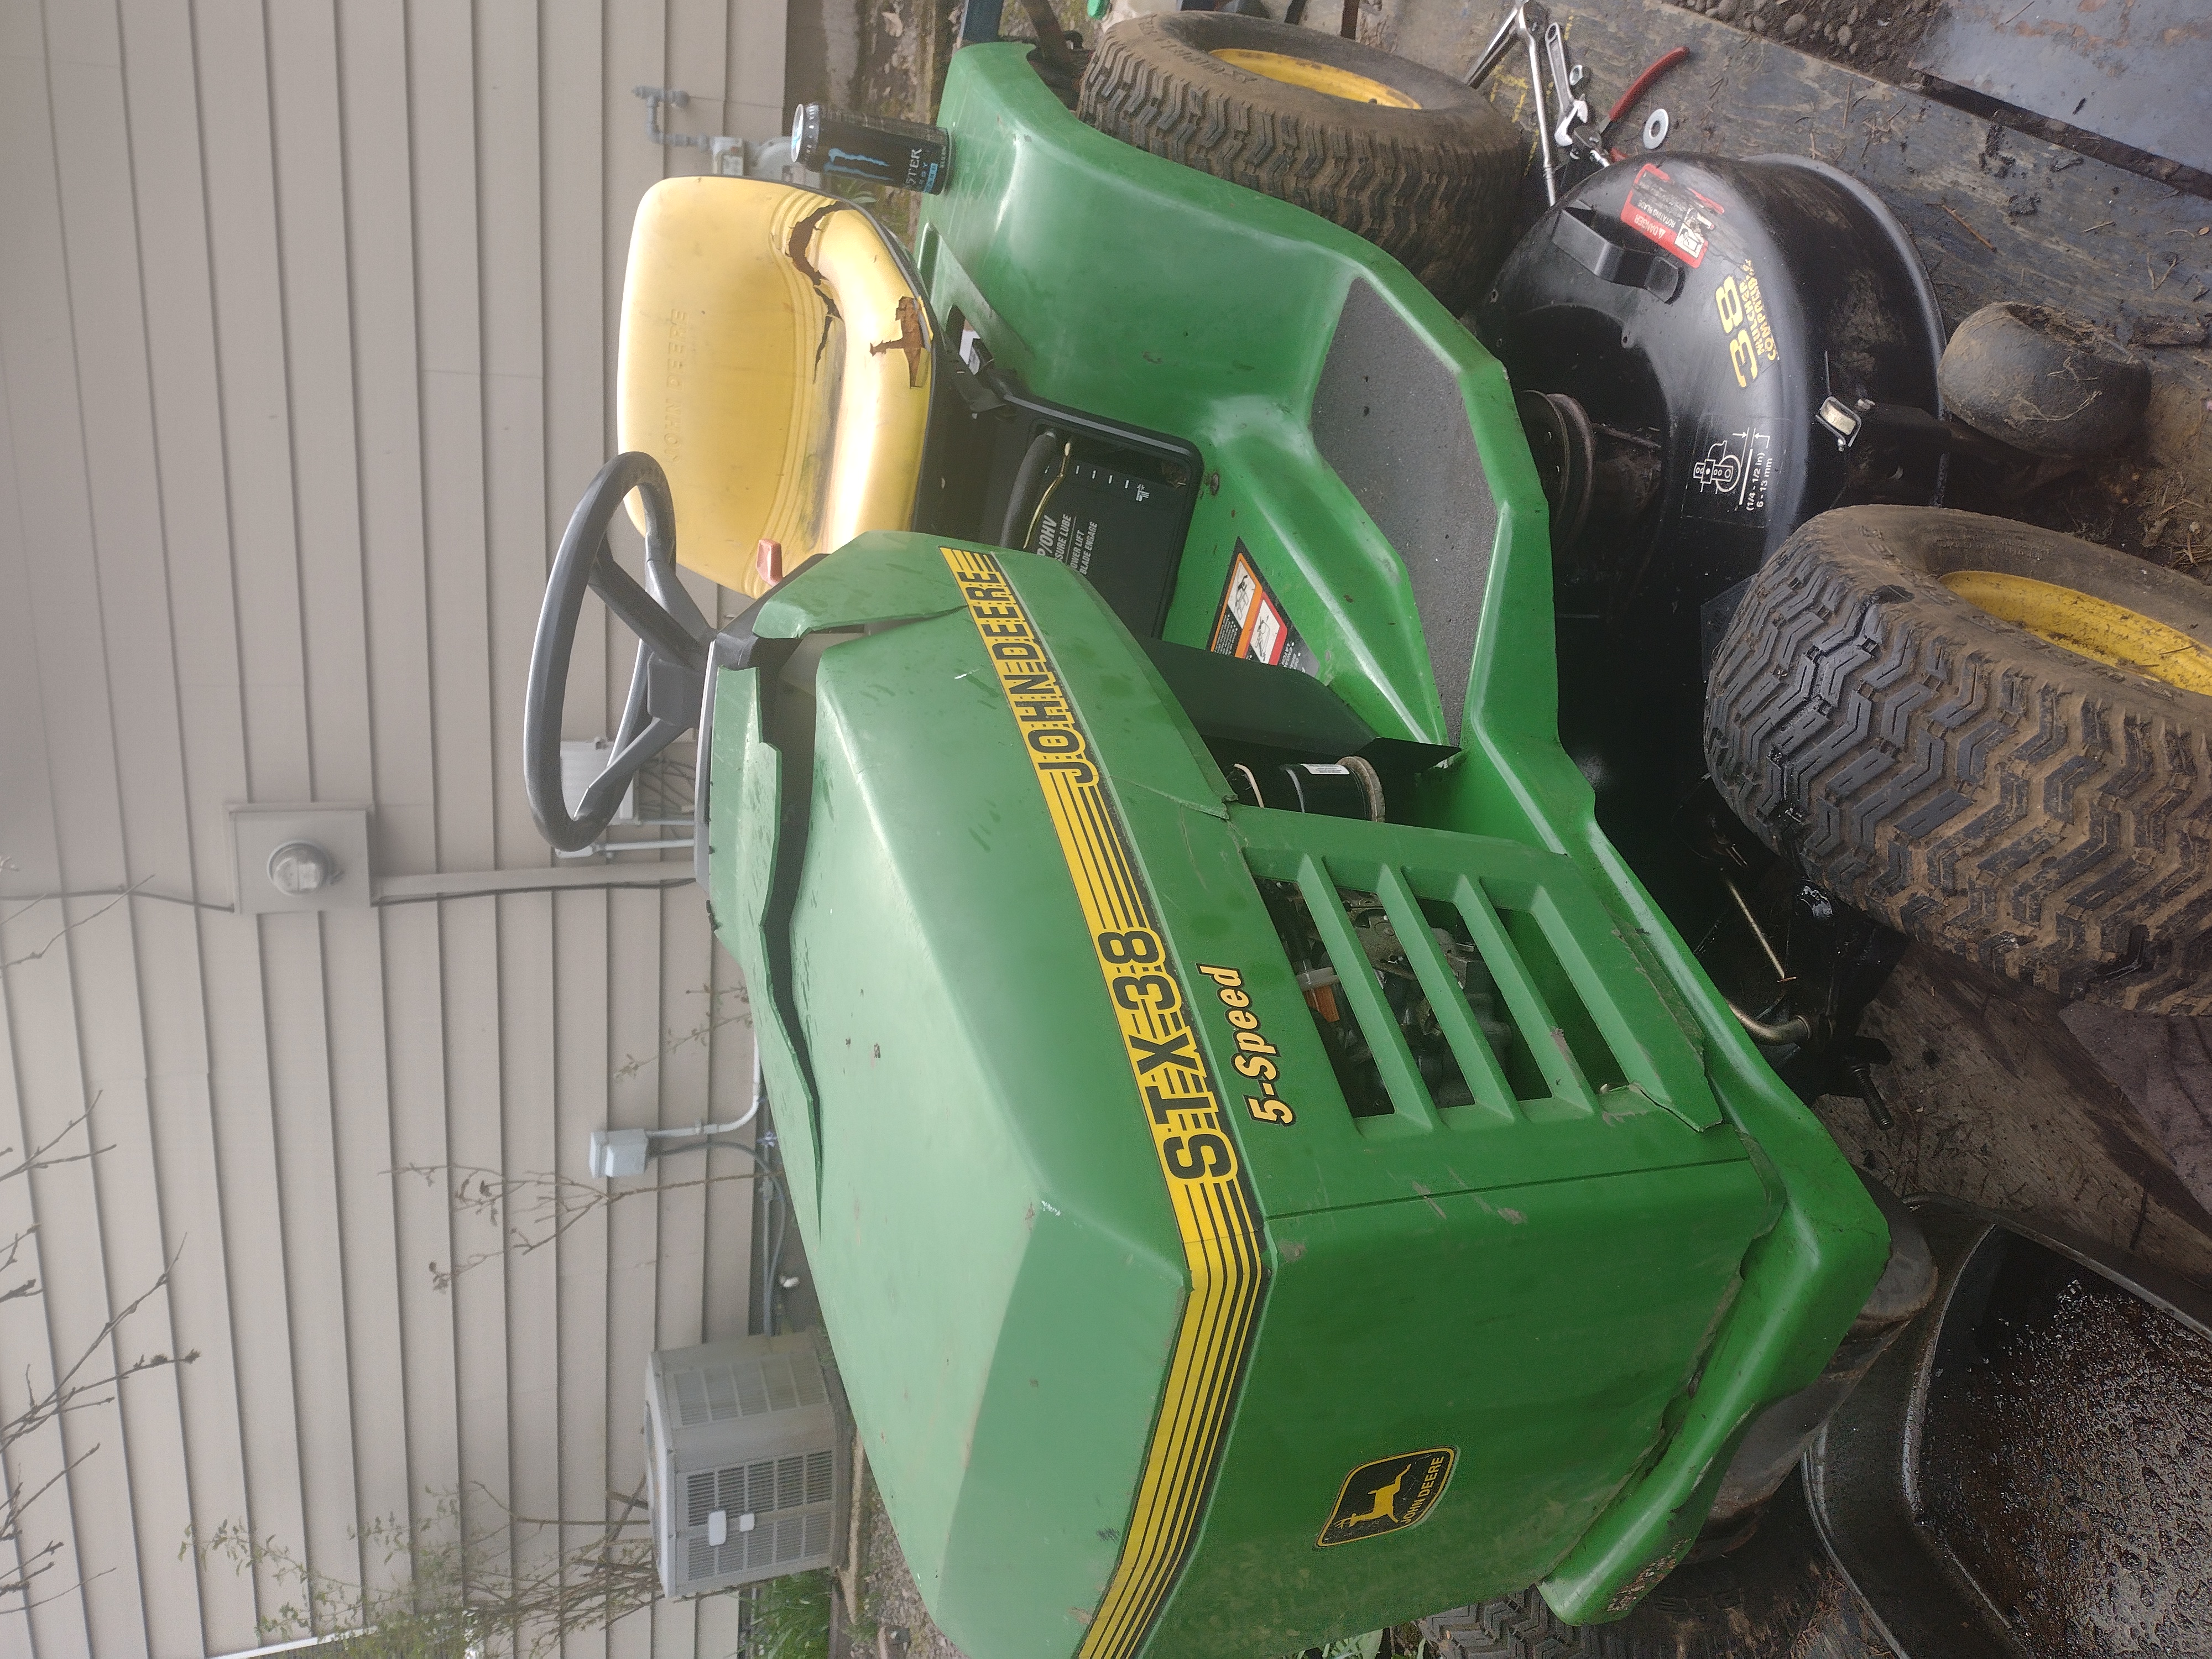
Not only is it broke to shit, there is a big hunk missing out of it and the mounting hardware and fixtures are gone too.
I figure if I can get this thing running and get the trailer fixed both for under $500 I will be doing good.
Even used John Deere tractors like that are expensive as hell around here and that trailer would run ya anywhere from $300 to $450 easy.
A comparable new JD riding mower isn’t going anywhere for less than $2,000.
Minimum.
It still remains to be seen if I can get that engine running but if it has decent compression then I will win eventually.
My buddy told me again earlier today that he saw it mowing the lawn next door to him last Summer so we shall see.
Back to the basics.
Some really great news, our Author has found all of the original pieces he wrote on an old Laptop he had forgotten about.
This will make things much easier.
This is important stuff here, the soil you have to use is the very basic foundation of any growing activities.
Crap soil will not grow the food you are going to need.
It can literally take years to supplement bad soil to get it up to optimal condition.
My thanks again to Food Grower for taking the time to share this very important information.
The foundation of it all, this thing called dirt
Hi Ho, Hi Ho
It’s Back to School We Go!!!
Dirt
It’s all around us, under our feet and buildings, sloping up to touch the clouds, in the air (at least during almond season) and apparently, according to my mother, in my ten year old ears “Land sakes boy, you got enough dirt in them ears to grow spuds. Get in there and wash your face.”
But, what is dirt? I’m not going to go all earth sciences on this but (you knew there was a but coming didn’t you?) we can’t avoid some science and fact finding in our pursuit of understanding our growing medium. This article is long for the simple fact this is complex topic. Even trying to keep it simple it’s still complex.
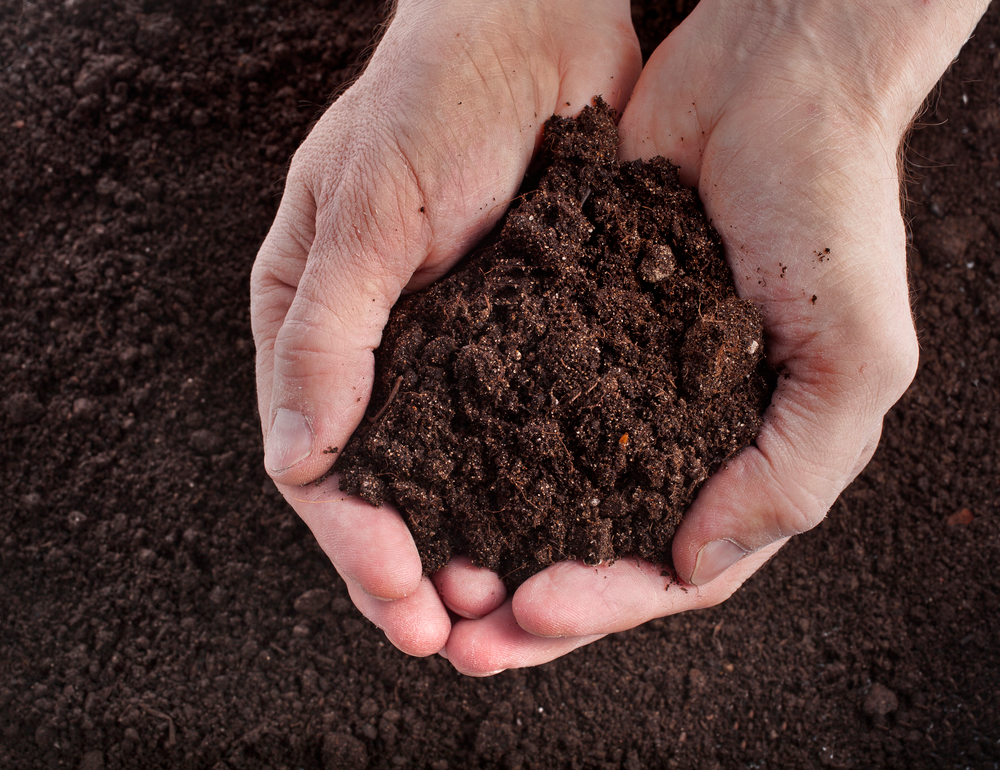
From the real world perspective of a food grower, dirt or more appropriate for our purposes soil, is a complex brew of bits of rock, sand, clay, silica, humus, organic matter, nutrients, organisms, moisture and microbial life all tangled together in a complex web. In balance this soil web is the root of sustaining life. Out of balance, well just cut your throat, it’s quicker than dying of starvation.
Before I move on I want to explore one of the above items in more detail – humus. A full definition and understanding of humus would most likely run to several pages and even then we would be left with questions. In a nut shell humus is what you get after the organic material in soil is completely broken down. Though characterized as being amorphous (without shape or form) it none the less contributes to the structure, fertility, porousness, and moisture retention of soil. You can feel and smell the difference between a poor soil and a soil rich in humus.
So why am I harping on humus? Humus is a vital part of a healthy soil. Also, though not fully understood, it is considered to be an inhibitor of some soil borne diseases and pathogens. Further, you can make it, as it is the desirable end result of a sound composting operation. Which, hopefully I’ll have the space to discuss at the end of this article.
In the last paragraph I used the term healthy soil. The contributors to a healthy soil are many. We need to understand them in order to determine our soil health and what modifications are needed when our soil health is poor. Until someone corrects me, what I feel are important to know are
– Base soil type – clay, sand, silt, peat, saline or combination thereof
– Essential nutrients – Nitrogen (N), phosphorus (P), Potassium (K), Calcium (Ca), Magnesium (Mg),
Sulfur (S), Zinc (Zn), Iron (Fe), Manganese (Mn), Copper (Cu), Boron (B) and Molybdenum (Mo)
(whew, I think I got most of them, there’s actually 16 in all)
– Organic content and humus
– Insect and microbial life
– pH level
– Moisture content
– Aeration
– Inorganic materials
Soil Types
Knowing your soil type will allow you understand the problems you may encounter when trying to grow food in it. Unfortunately there isn’t a whole lot you can do in the short term to change a poor soil type and even in the long term it can be quite a project. One means of dealing with a really poor soil is the utilization of raised beds and making the soil you fill them with. This doesn’t really change your soil type, just covers it over and I’ve previously dealt with its (raised beds) limitation in a truck garden situation. There are two places we use raised beds in our gardens, one is aesthetics, the other is for perennial plants like raspberries and blueberries as the raised bed provides better drainage. The beds for the berries don’t incorporate any structure to maintain shape and could more accurately be described as mounding.
To help you understand your soil type you can send a sample out to be analyzed by a lab or you can perform an old high school science project (real cheap). Dig down a few inches in your garden and collect between a ¼ cup and ½ cup of soil (more than ½ a cup is a waste and you’ll need a bigger jar). Pick out the bigger pieces of rock and organic debris. Dump this and two cups of water in a quart canning jar. It will help if you use an emulsifier (cheap alternative – liquid dish soap). Four or five drops is all you need. Shake the jar like mad for a minute or two and then set the jar down and let everything settle out. It may take a full day or even a little longer for this to happen. Unless you have a real odd soil you’ll see bands start to form in the jar as your curiosity gets the better of you and you take a peek now and again instead of waiting for the next day.
The layers in the jar will give you a rough idea of the components of your soil and the percentage of each. Small rocks and sand will be the bottom layer. Silt will be next and clay will be on top. If you have a lot of organic material in your sample it will settle at the very top or float on the water. Do not include the organic matter in the following calculations.
It is generally accepted that if 50% or more of the volume is sand your soil is classified as sandy. If over 50% is silt, you guessed it, you have a silty soil. If 25% or more of the volume is clay with a heavy silt deposit you have a clay soil. You can’t test for a peat soil this way and it’s probably true that if you have a peat soil type you already know it. Saline soil is another outlier because it more probably could be labeled a soil condition, rather than a soil type.
So what’s a good soil look like in the above test. If you have somewhere around 40% sand, 40% silt and 20% clay you have a pretty well balanced soil that would be considered a loamy soil. From this we can infer that loamy is not really a soil type, but more a soil blend.
Knowing the soil type will let you understand some of the problems it will give you. A clay soil can take a long time to get irrigated, yet when wet, it will hold moisture for a long time. Due to its density it can be difficult for air and nutrients to move through it as well. Sand has good drainage, probably too good as it will dry out quickly. It also has trouble holding on to the nutrients your plants need to grow. Silty soil is next to a good loam soil for growing but is easily eroded and when dry can be carried aloft by the wind. It can also manifest drainage problems.
Essential Nutrients
To understand the level of essential nutrients in your soil you need to send a sample to a lab to have it analyzed or purchase a test kit and do it yourself. Many of the test kits utilize a small sample of your soil, a chemical and a colored test strip. You prepare the soil sample, put it in water, add the chemical, wait for the reaction to occur and then compare the color of the sample with the test strip to get an idea of that particular nutrient.
Most of us are familiar with the big three, nitrogen (N), phosphorus (P) and potassium (K). The letters in parenthesis are the chemical symbol of the element. Nitrogen primarily drives foliage growth, phosphorus drives root and yield development and potassium helps develop a strong plant structure (stems and limbs) and supports flowering and fruit set.
I don’t want to bore you to death so I’ll just express inorganic fertilizers list each of the above as a three number grouping (i.e. 10,5,5) on the package. Nitrogen is first, phosphorus is second and potassium is third. Basically the numbers indicate how much of each you have in a given quantity of fertilizer. A twenty five pound bag of fertilizer labeled 10,5,5 would have 10%N, and 5% each of P and K. This is approximately 2.5 lbs of Nitrogen, and 1.25 lbs of phosphorus and potassium each.
Some organic sources for nitrogen are manures, worm castings, fish meal, blood meal and soybean meal. You need to be careful using manures to drive your nitrogen because fresh manure can be too hot (have too much nitrogen) and you’ll burn your plants. If you are going to use fresh manures it’s best to use them in the fall and till them in so they’ll have all winter to breakdown or use them on a patch of ground that is going to lie fallow for a year. It’s better if you compost all manures before you use them.
Phosphorus has two basic source forms, either mineral (rock dust) or bone (fish bone meal). The mineral forms last longer in the soil where the bone form is more readily available to the plant. Other organic sources are bat, pig and chicken manure (actually guano with bats).
Organic potassium sources are sheep manure, alfalfa or kelp meal, hardwood ashes and greensand.
A lessor known group of nutrients is Calcium (Ca), Magnesium (Mg) and Sulfur (S). Calcium is essential for building a strong cellular structure in the plant and supports the movement of nutrients to the plant. Magnesium is central to the atomic structure of chlorophyll. Sulfur helps plants with the formation of proteins. Different forms of sulfur perform different duties from an insecticide to altering soil pH. We’re focusing on its use as a nutrient here.
The above six elements are known as macronutrients. The rest of the elements could be considered to be trace elements. Their importance should not be overlooked however. An imbalance of any one of them can give you trouble in the garden. To avoid this article becoming overly long (which it already is) I’ll address them in the comments or another article if there is enough interest.
Once you understand what the various elements do, and by testing, know how much is present in your soil you know how much you need to add to correct your soil. Depending on how you go about amending your soil this can be a little of a guessing game. You have a get out of jail free card if you compost.
Organic content and humus
I’ve previously addressed humus in this article. Other organic content in your soil will be bits of plant residue, woody structure and the remains of small animals and insects. These all contribute to the structure and health of your soil, especially at the microbial level.
Insect and microbial life
A healthy soil will have a whole host of beneficial insects and microbial life that process your soil, have symbiotic relationships with your plants and perform many critical functions converting one thing to another. This is why we can’t overlook the detrimental impact of insecticides when we attempt to deal with insect pests. In many instances we can utilize cultural controls or a beneficial insect to deal with a pest and leave the good bugs alone by leaving the insecticide on the shelf.
pH level
In plain language soil pH is a measure of the acidity or alkalinity of your soil. It is measured on a range from -1 to 14. A pH of 7 is considered neutral. Lower numbers indicate a more acidic soil while higher numbers indicate a more alkaline soil. The vast majority of your garden plants will do well in soil with a pH between 6 and 7. The reason pH is important is because the more acidic a soil is, the more soluble most elements are. Eventually, elements like aluminum and manganese become too soluble, the plant suffers from toxicity and may even die. Highly alkaline soils lock up nutrients and elements and negatively impact the roots ability to take them in, plant health suffers as a result.
It is usually considered to be easier to raise your soil pH than to lower it. Dolomite lime is an effective means of raising the pH. You actually have several ways to lower the pH of your soil. The two I use are acetic acid for a short term response and elemental sulfur for a long term approach. If you can’t find acetic acid use 5% white vinegar instead. I use this in irrigation water to provide a quick response for plants needing a lower pH. It breaks down quickly in the soil though.
Moisture Content
Just as with virtually everything else in your soil, too much or too little moisture will be detrimental to your efforts. Some soils, notably very sandy soils and heavy clay soils, will negatively impact your ability to maintain a proper moisture content. While insufficient moisture content is readily recognizable by wilted plants and fruit drop, excessive moisture can cause problems as well, often long before the plant exhibits any stress symptoms and by then it’s too late. Raspberries are a good example, they like a lot of water but they don’t like to have wet feet. Your soil for raspberries (and many other crops) requires good drainage.
A problem with maintaining a proper moisture content is understanding how much water is required for certain plants. Many times you’ll read something like blueberries require 1~2 inches of water a week. Well how much water is that? The following will help you convert inches a time period to gallons a time period. I have input the following into a spreadsheet that makes it fast and painless to perform the conversions.
First some constants.
1 square foot is 144 square inches. 1 inch of water on one square foot = 144 cubic inches. There are 231 cubic inches of water in one gallon. It takes 0.623376623 gallons of water to cover 144 square inches 1 inch deep
Next calculate the square footage (in feet, dimensions less than 1 foot use the decimal value). Rectangle areas are width X length. Circular areas are pi X radius2 or 3.1416 * (radius squared).
Once you have the area, multiply it by 0.623376623. Then multiply this result by the number of inches of water.
The time period doesn’t matter. If your plant needs 2 inches of water per week you just need to perform the above calculations to figure out how many gallons per week you need to apply. If you water three times a week, divide that amount by three.
The following is for a blueberry plant having a root ball diameter of five feet
((3.1416 X 2.522) X 0.623376623) X 2
((3.1416 X 6.35) X 0.623376623) X 2
(19.94916 X 0.623376623) X 2
12.435 * 2 = 24.87 gallons of water per week.
Aeration
Your plant roots need air. Too much water can drown plant roots, heavily compacted soils will inhibit the movement of air to your plant roots, so can heavy clay soils. If your water problem comes from over watering then you need to cut down on your irrigation. If the excessive water is from another source (too much rain) then you may need to plant in a raised bed, or incorporate drain tiles in your ground. Heavily compacted soils or just heavy clay soils will benefit from amendments that open up the soil. Sand, perlite and compost are three things you can add to improve drainage and aeration.
Inorganic Materials
Rocks and man made waste are probably the two largest components of inorganic materials. Usually size determines whether it will have an impact on your gardening efforts. I try to remove all larger rocks, broken glass, metals and plastics from the soil as I encounter them.
Composting – Your get out of jail free card
There are probably as many opinions on composting as there are people that compost. There are all kinds of systems, bins, amendments, starters and gizmos for sale to help you compost. As far as I’m concerned you don’t need any of them.
When you compost you incorporate materials in a pile and let microbial action break down all the organic material to a rich humus. As stated way up near the top of this article, humus is very beneficial to your soil. A finished compost has a pH of right at 7. Most properly finished composts (somewhat dependent on base materials) will have a NPK of 0.5, 0.5, 0.5, a mild, yet well balanced, amount of essential nutrients. Finished compost will build and feed your soil over a long period of time. It will add to the structure of your soil and improve its drainage and moisture retentive qualities. While these sounds contradictory they’re not.
Composting requires a nitrogen component, a carbon component, oxygen and water. Reading the previous sentence you may get the impression you need four different things to compost. This is incorrect because all organic materials have nitrogen and carbon in their cellular structure and you can compost a single material, it just may not compost as quickly or efficiently as a pile incorporating multiple materials to maintain the proper ratio of carbon to nitrogen. The microbes that break down compost need about 30 parts carbon for every part nitrogen in your pile. You can research various materials to find out the actual carbon to nitrogen ratio each has in an effort to maintain the optimal amounts of each in your pile. I’ve spent time on this in the past but after composting for many years I’ve developed a more or less seat of the pants approach to it.
Rather than keep talking about it, here’s how I compost. I used green grass clipping for a primary nitrogen component. I use chopped wheat and barley straw for a primary carbon component. I use chicken manure for an additional nitrogen component and as an accelerator for the composting process. (you can use other manures)
I put down about a two inch deep layer of grass clipping right on the ground. This is usually spread over an area about six to eight feet wide by fifty feet long. Next I’ll spread about three inches of chopped straw on top of that. Next comes a heavy sprinkling of chicken manure over the whole thing.
Next I fire up my garden tiller and use it as a mobile agitator and run back and forth across the pile until it is mixed. Then I’ll toss on another layer of everything and then till across the pile again until it is thoroughly mixed. I’ll keep this up until my stack is around five feet tall (actually until it becomes hard to keep the tiller from falling off an edge). At this point I stop building the stack. Now comes the hard part. Using heavy silage forks we start rolling the pile to an area right beside our pile. As we roll the material, we spray the new pile we are building, heavily with water. We’ll roll the entire first pile into a new pile wetting every bit of it. At this point our initial work is done. We know we have watered it well enough if we have a little water seeping from the bottom of the pile.
We DO NOT maintain this moisture level throughout the process. After this initial wetting we strive to maintain about a 45% moisture content of the stack. The easiest way to determine this is the squeeze test. If you squeeze your compost and water drips out it’s too wet. It it is dry and crumbly and won’t stay together it is too dry. If you can squeeze it into a ball, no water drips out and it holds its form you have it just right. We will water our stack by spraying the outside of the pile and occasionally by forcing water into the stack. Additionally, every time we roll the stack we will add water as required. After our initial wetting, we usually use a fine misting nozzle for subsequent wettings.
I’ll monitor the stack temperature daily after a couple of days to make sure it doesn’t get too hot (an old long probe meat thermometer works great). I like to keep my stacks at around 140 ~ 145 degrees F. This temperature is high enough (132+ degrees) to kill most weed seeds and speeds the breakdown portion of composting. My max temperature is 150 degrees F. If I reach this temperature I’ll inject cold water to the stack and spray the outside of it to cool it down. Temperatures above 160 degrees F. will kill the microbes doing the work. If the stack temperature starts to run away and I can’t control it by water injection then we’ll roll the stack again. This has the added benefit of aerating the stack.
Once the temperature of the stack drops below 100 degrees F. we roll the stack. The temperature will start climbing again after a few days as the microbes kick up their activity. We’ll continue to monitor and roll the stack until we don’t get a temperature spike after rolling. At this point we leave the stack alone to finish out the process or cure, this period of time can vary from a few months to the next spring. A small tractor with a loader helps greatly in rolling the stacks but be aware you can do it all by hand should it become necessary.
Additional notes on composting
The above is by not, by any means, intended to convey the idea that you have to compost like I do. Composting is a highly complex subject and you can spend an inordinate amount of time in researching the various particulars and what is best for you. I’ve just reached the point in my life and gardening efforts where I just do it as opposed to researching every little aspect of it because I know my method works for me in my environment and soil.
Though we incorporate a lot of different materials from the garden in our stacks we never add any meat or meat byproducts to our stack.
The reason for using grass clippings and chopped straw is smaller particles break down faster. This holds true for all materials added to your pile, especially materials like corn stalks.
If for some reason we feel the microbial action is not as high as we like we will incorporate a layer of soil about ½ inch thick into our above mix ratios. This introduces microbes from the soil to the stack.
Chemicals, such as selective herbicides, may become locked in the material you add to your compost pile. Microbial action on your compost may then release these chemicals into your garden soil having an adverse impact on you growing efforts. Give this some thought if you use weed and feed type fertilizer on your lawn.
Til next time
foodgrower
And meant it.

TPTB are so desperate to keep us off balance and busy to focus on their criminal activity that if they can’t get WW IV going , Aliens are going to be the next distraction on the menu.
You can take that to the bank, that place you used to keep something called money.
That stuff they are doing their damndest to make sure you don’t have any of.