If ya don’t fail once in a while ya ain’t trying the way I see it.
I guess we’ll start with the loss and get that out of the way.
Like I said, it might be different if I knew what I was doing but I try not to let fear stop me.
Sometimes you get experience the hard way.
I’m sure someone will let me know what the hell I was doing wrong there. I’m thinking I didn’t have it spinning fast enough and I was also feeding too fast at the same time.
Definitely more practice needed.
I also need to get serious about finding a way to mount my phone so it doesn’t fall on the damn floor too.
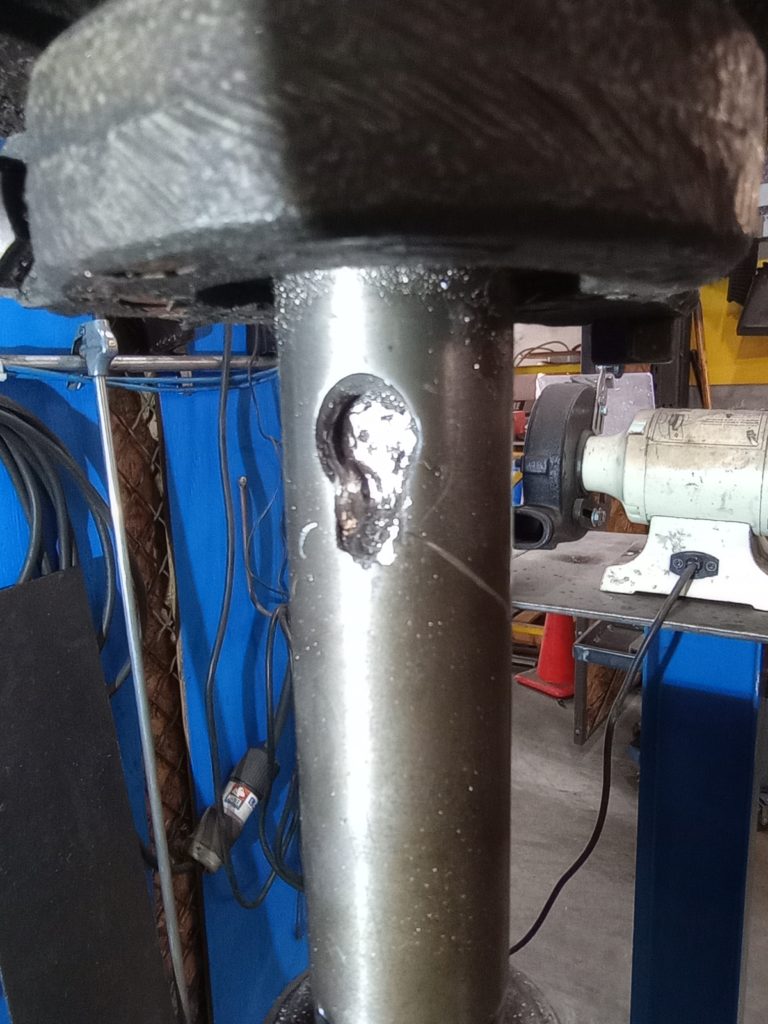
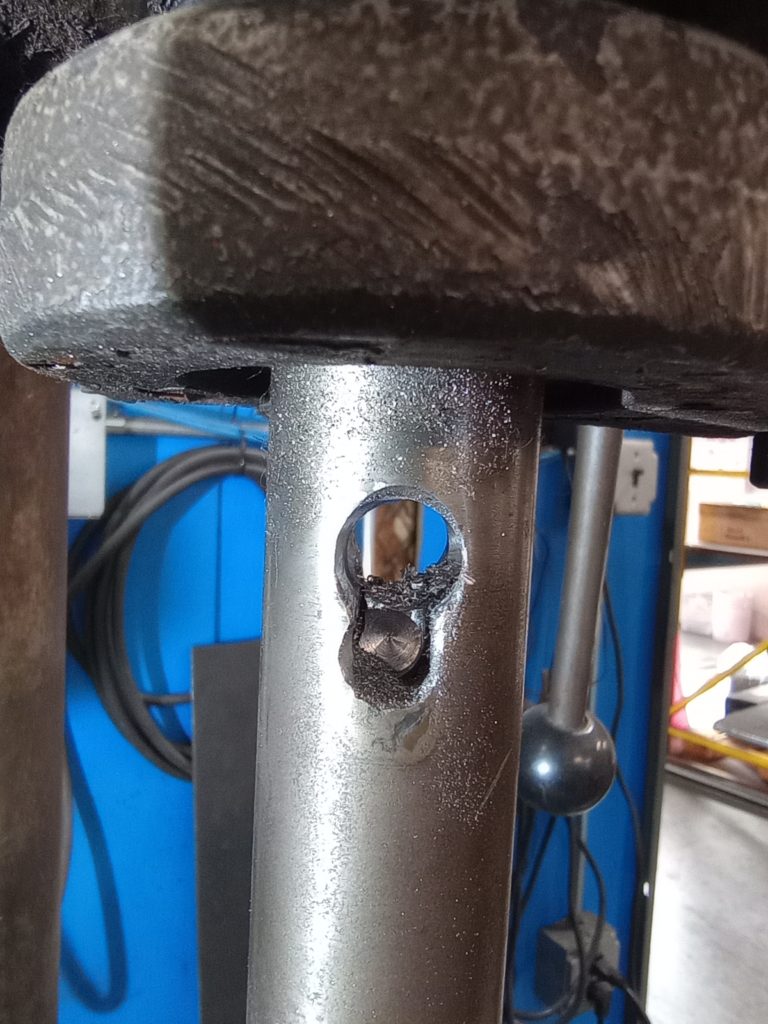
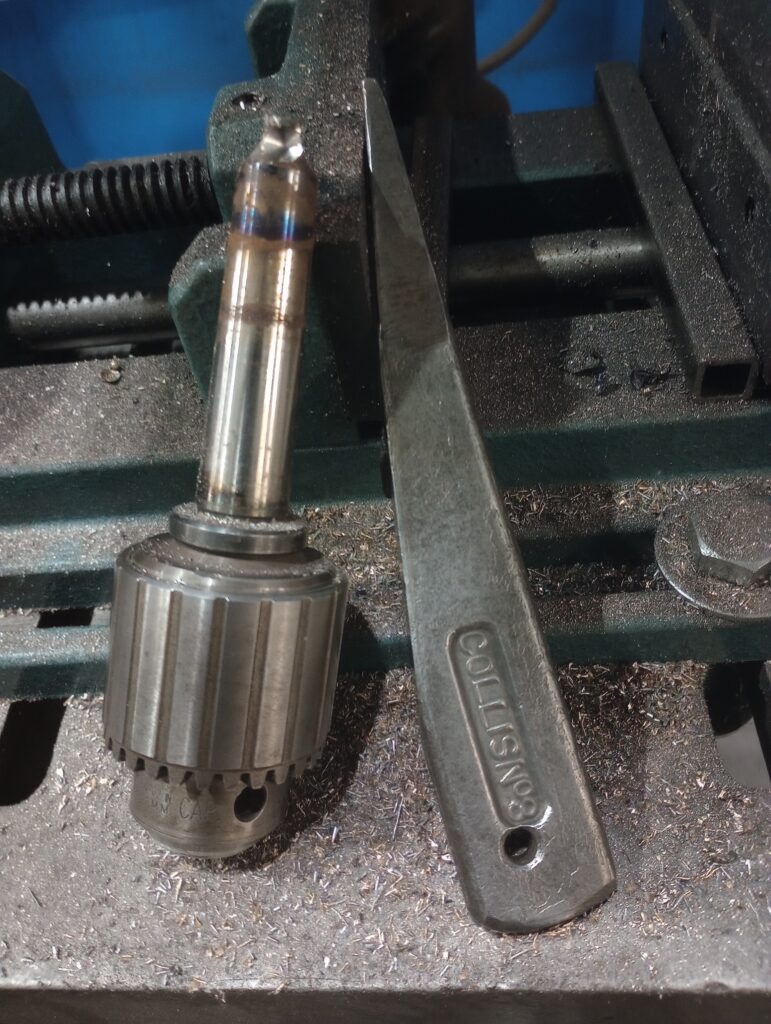
So that didn’t turn out so well but I did have a win, the follow up to the messed up drill press at work where some dumbass welded the Morse Taper for the chuck into the spindle.


I took my wedge in to work.
3 whacks on one side, spin it 180 degrees and one more whack.

I was actually surprised it came out that easy.
Once I got it out I tried to use my MT2 taper reamer up in there to clean it out but it feels like it’s a bit out of round.
What a surprise eh?
The heat of welding the fucker in there couldn’t have been good for it.
I have a new taper and a keyless chuck coming plus a couple more blank tapers.
Next I need to smear some Dykum on a taper and see what I’m getting for a contact patch before I get too serious with the reamer.
This is one of those Baby Steps kinda thing. I don’t want to go Hog Wild right out of the gate, I want to sneak up on it a little at a time.
So there ya are, a win and a loss.
Batting .500 for the week.
Could be worse.

.500 wins you a batting title good work
Yep. Nothing wrong with “Batting .500 for the week.”
Usually takes me two weeks to hit that.:)
off hand, I would say your right about the cutter speed and how fast you spin the handwheel. slow down your feed and speed up the cutter.
I got kind of spoiled as I use my atlas metal shaper to make things flat.
that makes a nice finish if the bit sharp. takes a while, but it does have a auto feed
system so, the finish comes out real nice with the right bit.
and I have a ton of old lathe bits to work with.
Think of all the electric vehicle charging you wasted! As an electrical engineer, I find a machinist to do this stuff! Just messing w/ ya. Your stuff motivates me to continue learning how to weld. Machining is probably up next!
Story I hear is, cut dry with carbide because the edge doesn’t like the temperature swings the fluid gives.
Carbide isn’t as sharp as HSS, and you may not be taking a thick enough chip to make the inserts perform well. May be able to google a sheet for that exact insert with recommended numbers. If not then google an insert that looks as similar as you can find.
Setup will be more rigid if you take that rotary base off the vise and only use it when you need it.
I am not a pro, at all, but have some hard won suggestions.
Why is the machine vibrating before you take a cut? Loose pulley? Bad belt? Bad gear?
It’s rotary and cyclic- clearly audible on the video.
Put a piece of paper between the work and the movable jaw of the vise- this will take up a couple thou out of parallel on the stock. Tap the stock with a copper or lead hammer after tightening the vise,to seat it on the parallels.
Calculate the feed rate and rpm to look for a chip about .004″-.008″.
Maybe start about 250- RPM, about 130 surface ft per minute, .005″ chip per tooth. About 5″ per minute. Maybe .01″-.02″ to start for cut depth. Take at least .005″ DOC, carbide inserts for steel do not like skim cuts. It can be run dry at these speeds.
If the chips are blue, slow the rpm down. Straw is OK, steel color maybe speed up a little.
If it chatters, lathe or mill, rule of thumb is to slow the rpm or increase the feed
rate.
Before you start a cut, check every clamp, bolt hold down, vise, arbor nut, spindle nut etc. Every travel lock should be tight except for the axis you are using.
Keep a notebook of what and how -material, cutter, RPM and feed so you can record the good and the bad.
A lot of suggestions for speeds and feeds are going to be to maximize productivity in a modern machine shop- with manual machines many of the recommendations are way too fast. There are several really good books out there aimed at the garage machinist.
Here is a calculator.
http://www.carbidedepot.com/formulas-milling.htm
Don’t know if you have a copy of Machinery’s Handbook or not. If not perhaps you should get one. They have a chapter on feeds and speeds that the manager of the machining dept where I used to work used when programming the mills and lathes both CNC and non-CNC. Maybe Irish has a couple of editions sitting around doing nothing that he’d part with.
There are also all kinds of sites that can help with that also, as I’m sure you’re aware.
Since I’m a chickenshit, when I do a cut like that for the first time, I adjust the depth of cut to damn near nothing, like under .003 (thickness of a thin sheet of paper). Spin up the cutter and see what happens. Also, it’s not unusual to have one of the carbide inserts that’s lower than the others by a thou or so, so I make sure I set depth of cut on that one.
The marks you have may come out with a spring pass or two – cut the same depth of cut, same everything.
I’m not a machinist, and my itty-bitty CNC is teaching me about feeds & speeds for sure!
Working with wood is extremely forgiving, but I have to cut some plexiglass and later work my way up to soft/thin sheets of metal – faceplates for my Beaver’s control panels that I have modified over the years…
I’ll stick with simple stuff. It’s fun watching Phil break stuff.
Does the mill have a power cross feed, or were you feeding by hand?
If it is a hand feed, getting an old variable speed drill motor , the kind with a lockable speed/screw setting right on the trigger, and making an attachment to engage the cross feed handle might be a neat trick.
The chips and chatter have all the signs of a hard piece of metal. Can you cut it with a file? Carbide will cut hardened steel, but you end up with just the finish shown on a relativly heavy depth of cut. The interupted cut, meaning all the holes, is always tough. Ive never been fond of those type of insert cutters, for face milling I prefer the brand called Love-Joy, aptly named.
I support the above poster about the vise, get rid of the swival.
Keep the spindle as short as you can, the quill is for drilling, when milling keep it up as short as you can.
Your speed is fast, the feed slow.
I say you try a piece of aluminum, all else the same.
70s voc-ed trained, been makin chips for over 45 years.
As a journeyman machinist I would say this…..
First- Rigidity is everything
Second- Carbide inserts do not like interrupted cuts
Third- Basic formula for rpms is 3.82 x surface footage divided by diameter of tool (endmill or drill) or work piece if running a lathe.
Fourth-Nothing is set in stone. Sometimes you just gotta run it so its happy, and youll scratch your head why it works.
Lastly, If Im running a two inch face mill in mild steel (1018 / a36) itll be 1800ish rpms, 20ipm feed at .050″ cut. But thats a quality sandvick cutter and inserts and rigid machine.
As far as chip color goes blue is not the end of the world. Brown is best.(for carbide)
For high speed steel…. blue chips are the beginning of the end.
Use coolant or oil for drills and endmills carbide or not. Carbide inserted tools dont need it for the most part.
Happy chip making!!
Ryan called it. Rigidity looks to be the issue. That is a lot of cutter for that smithy to be pushing. RPM looks ok, and with hand feed you adjust on the fly for chatter. None of that matters if the cutter is floating on the part and carbide hates chatter. I also saw a suggestion to try some aluminum and see if the mill will handle that. Your other option is a single point fly cutter to face larger pieces, but watch your fingers…….